Ready to Plant
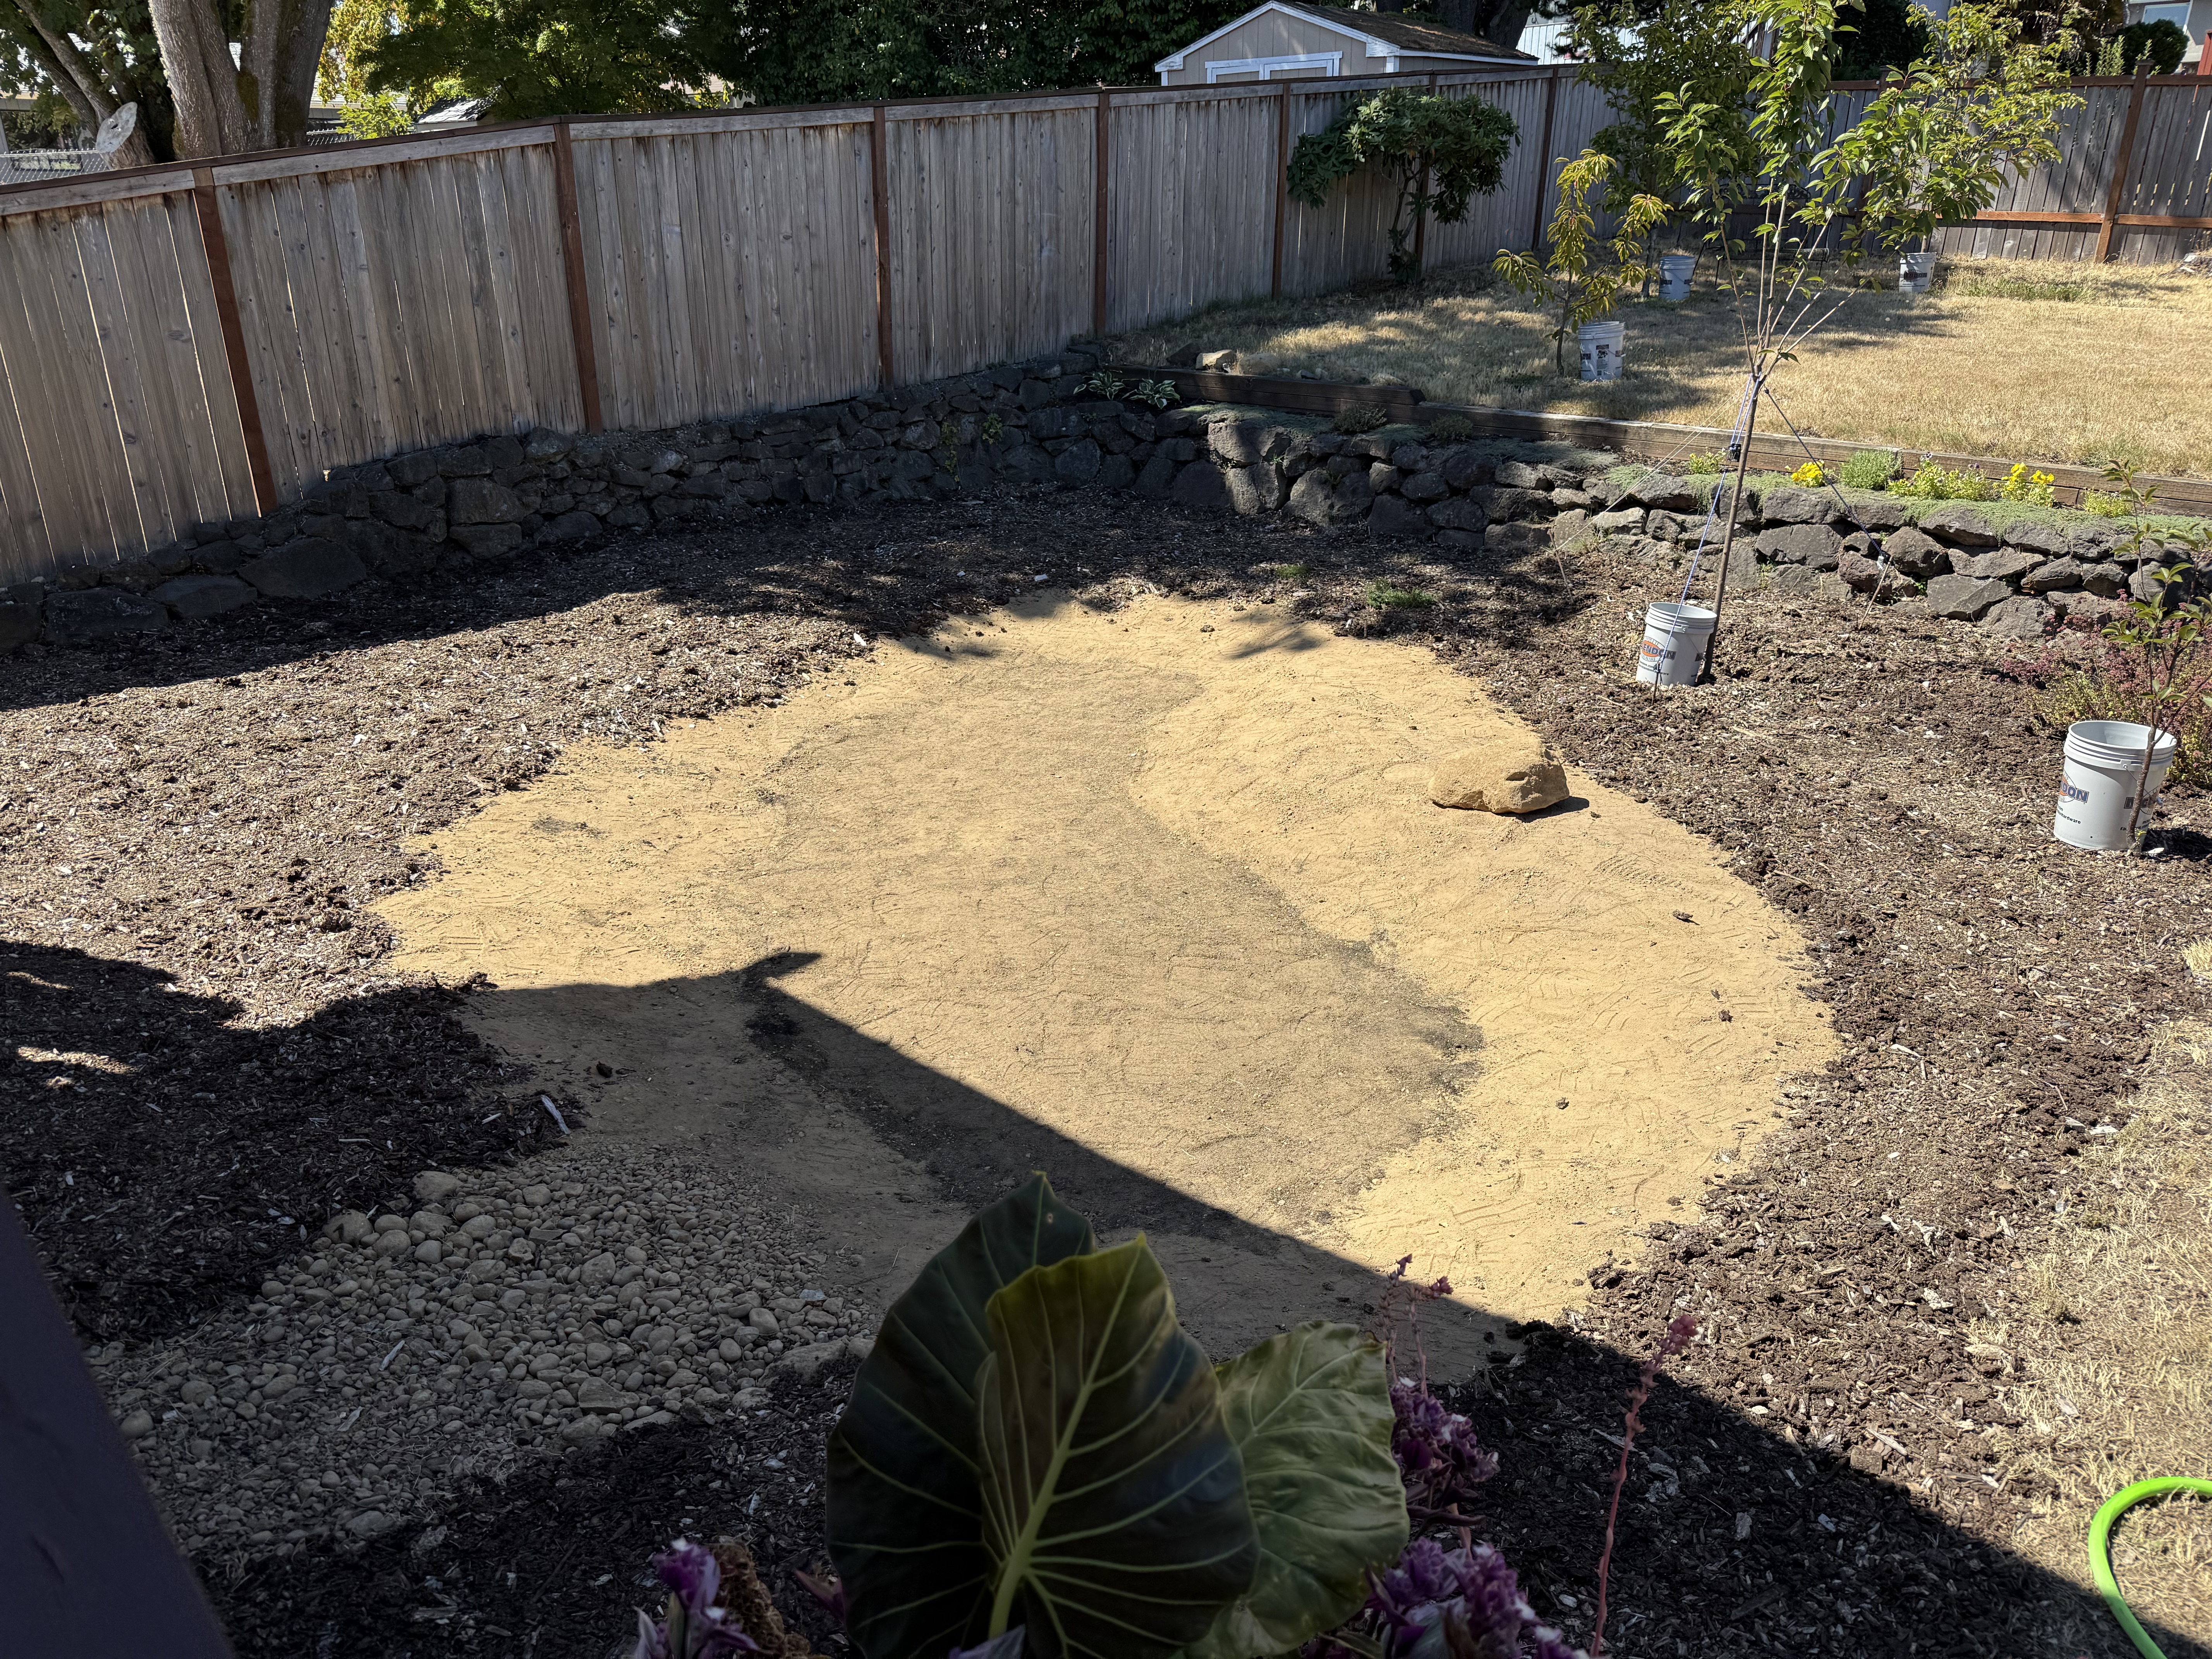
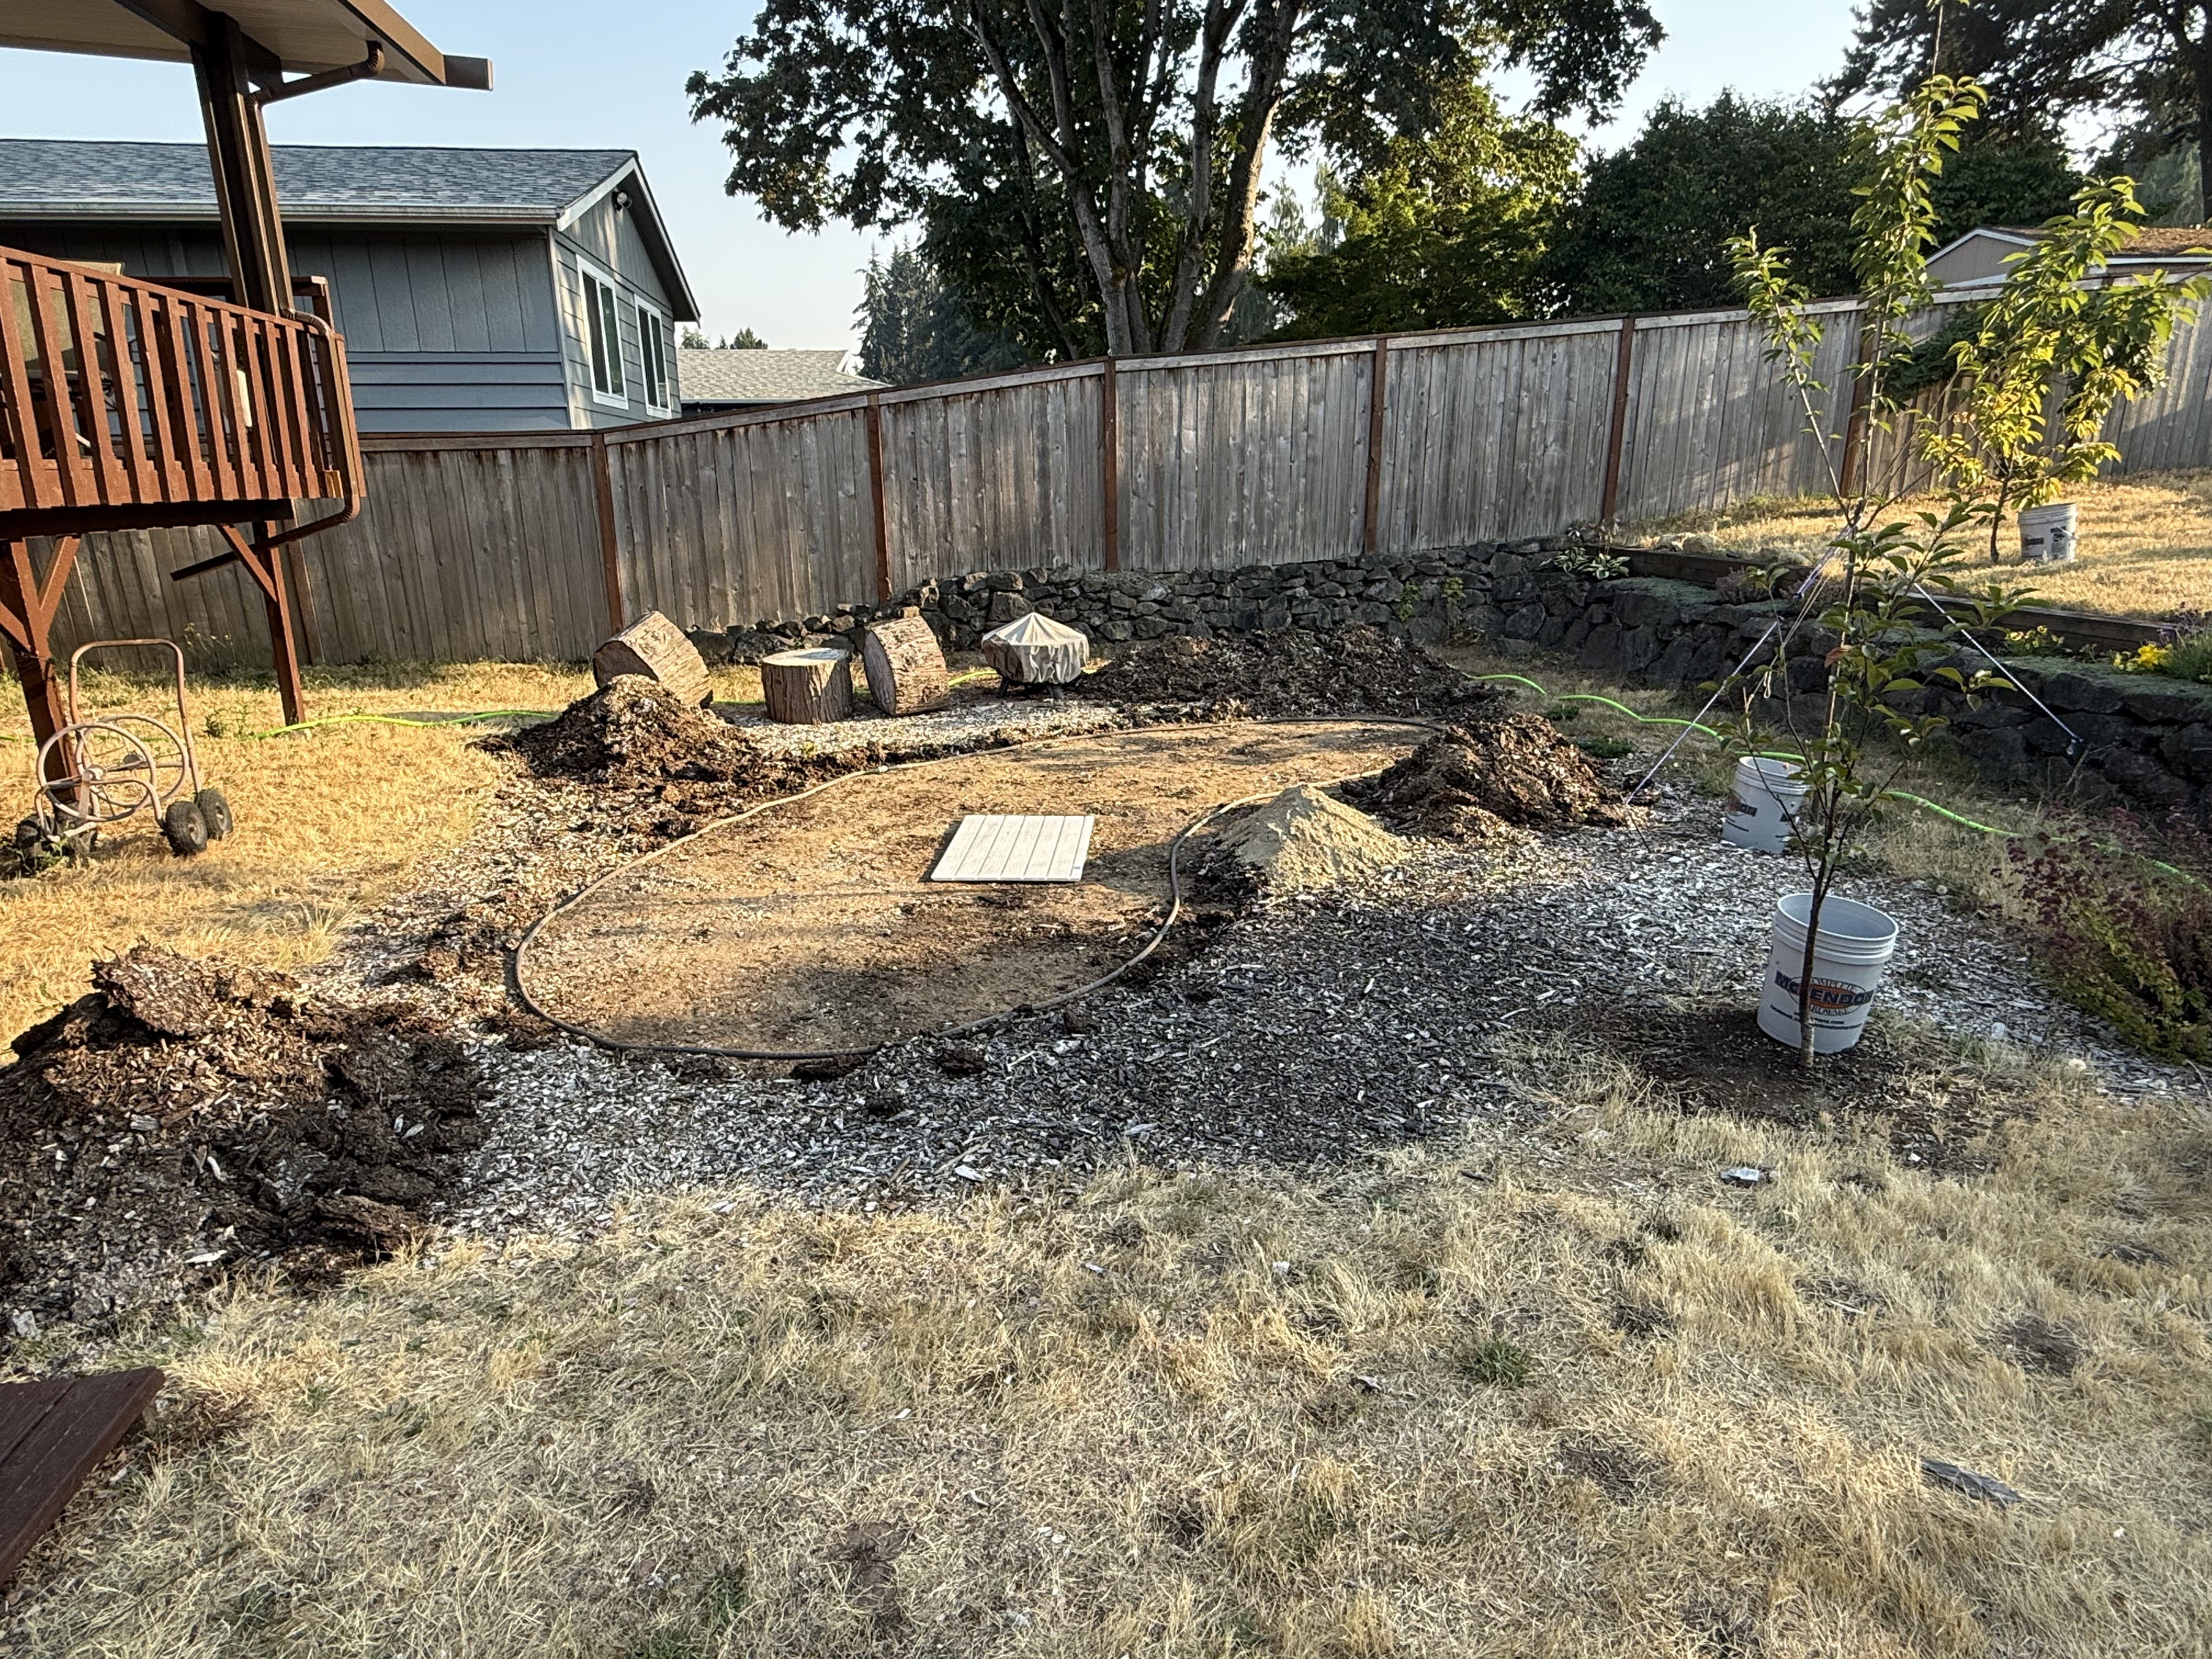
I amended the soil with 15 cubic feet (~1/2 cubic yard) of Tacgro compost at about 1:1. That’s the darker soil in the bottom of the pond. The original mulch was spread out 4-6 inches deep, sufficient to cover the grass and weeds; it’s ready for planting.
That’s not my department, unless a hole has to be dug in the stony, original soil.
The total time for this project was about 20 hours. The only cost was 14 bags of compost, less than $100.
Sisyphus and the Stone
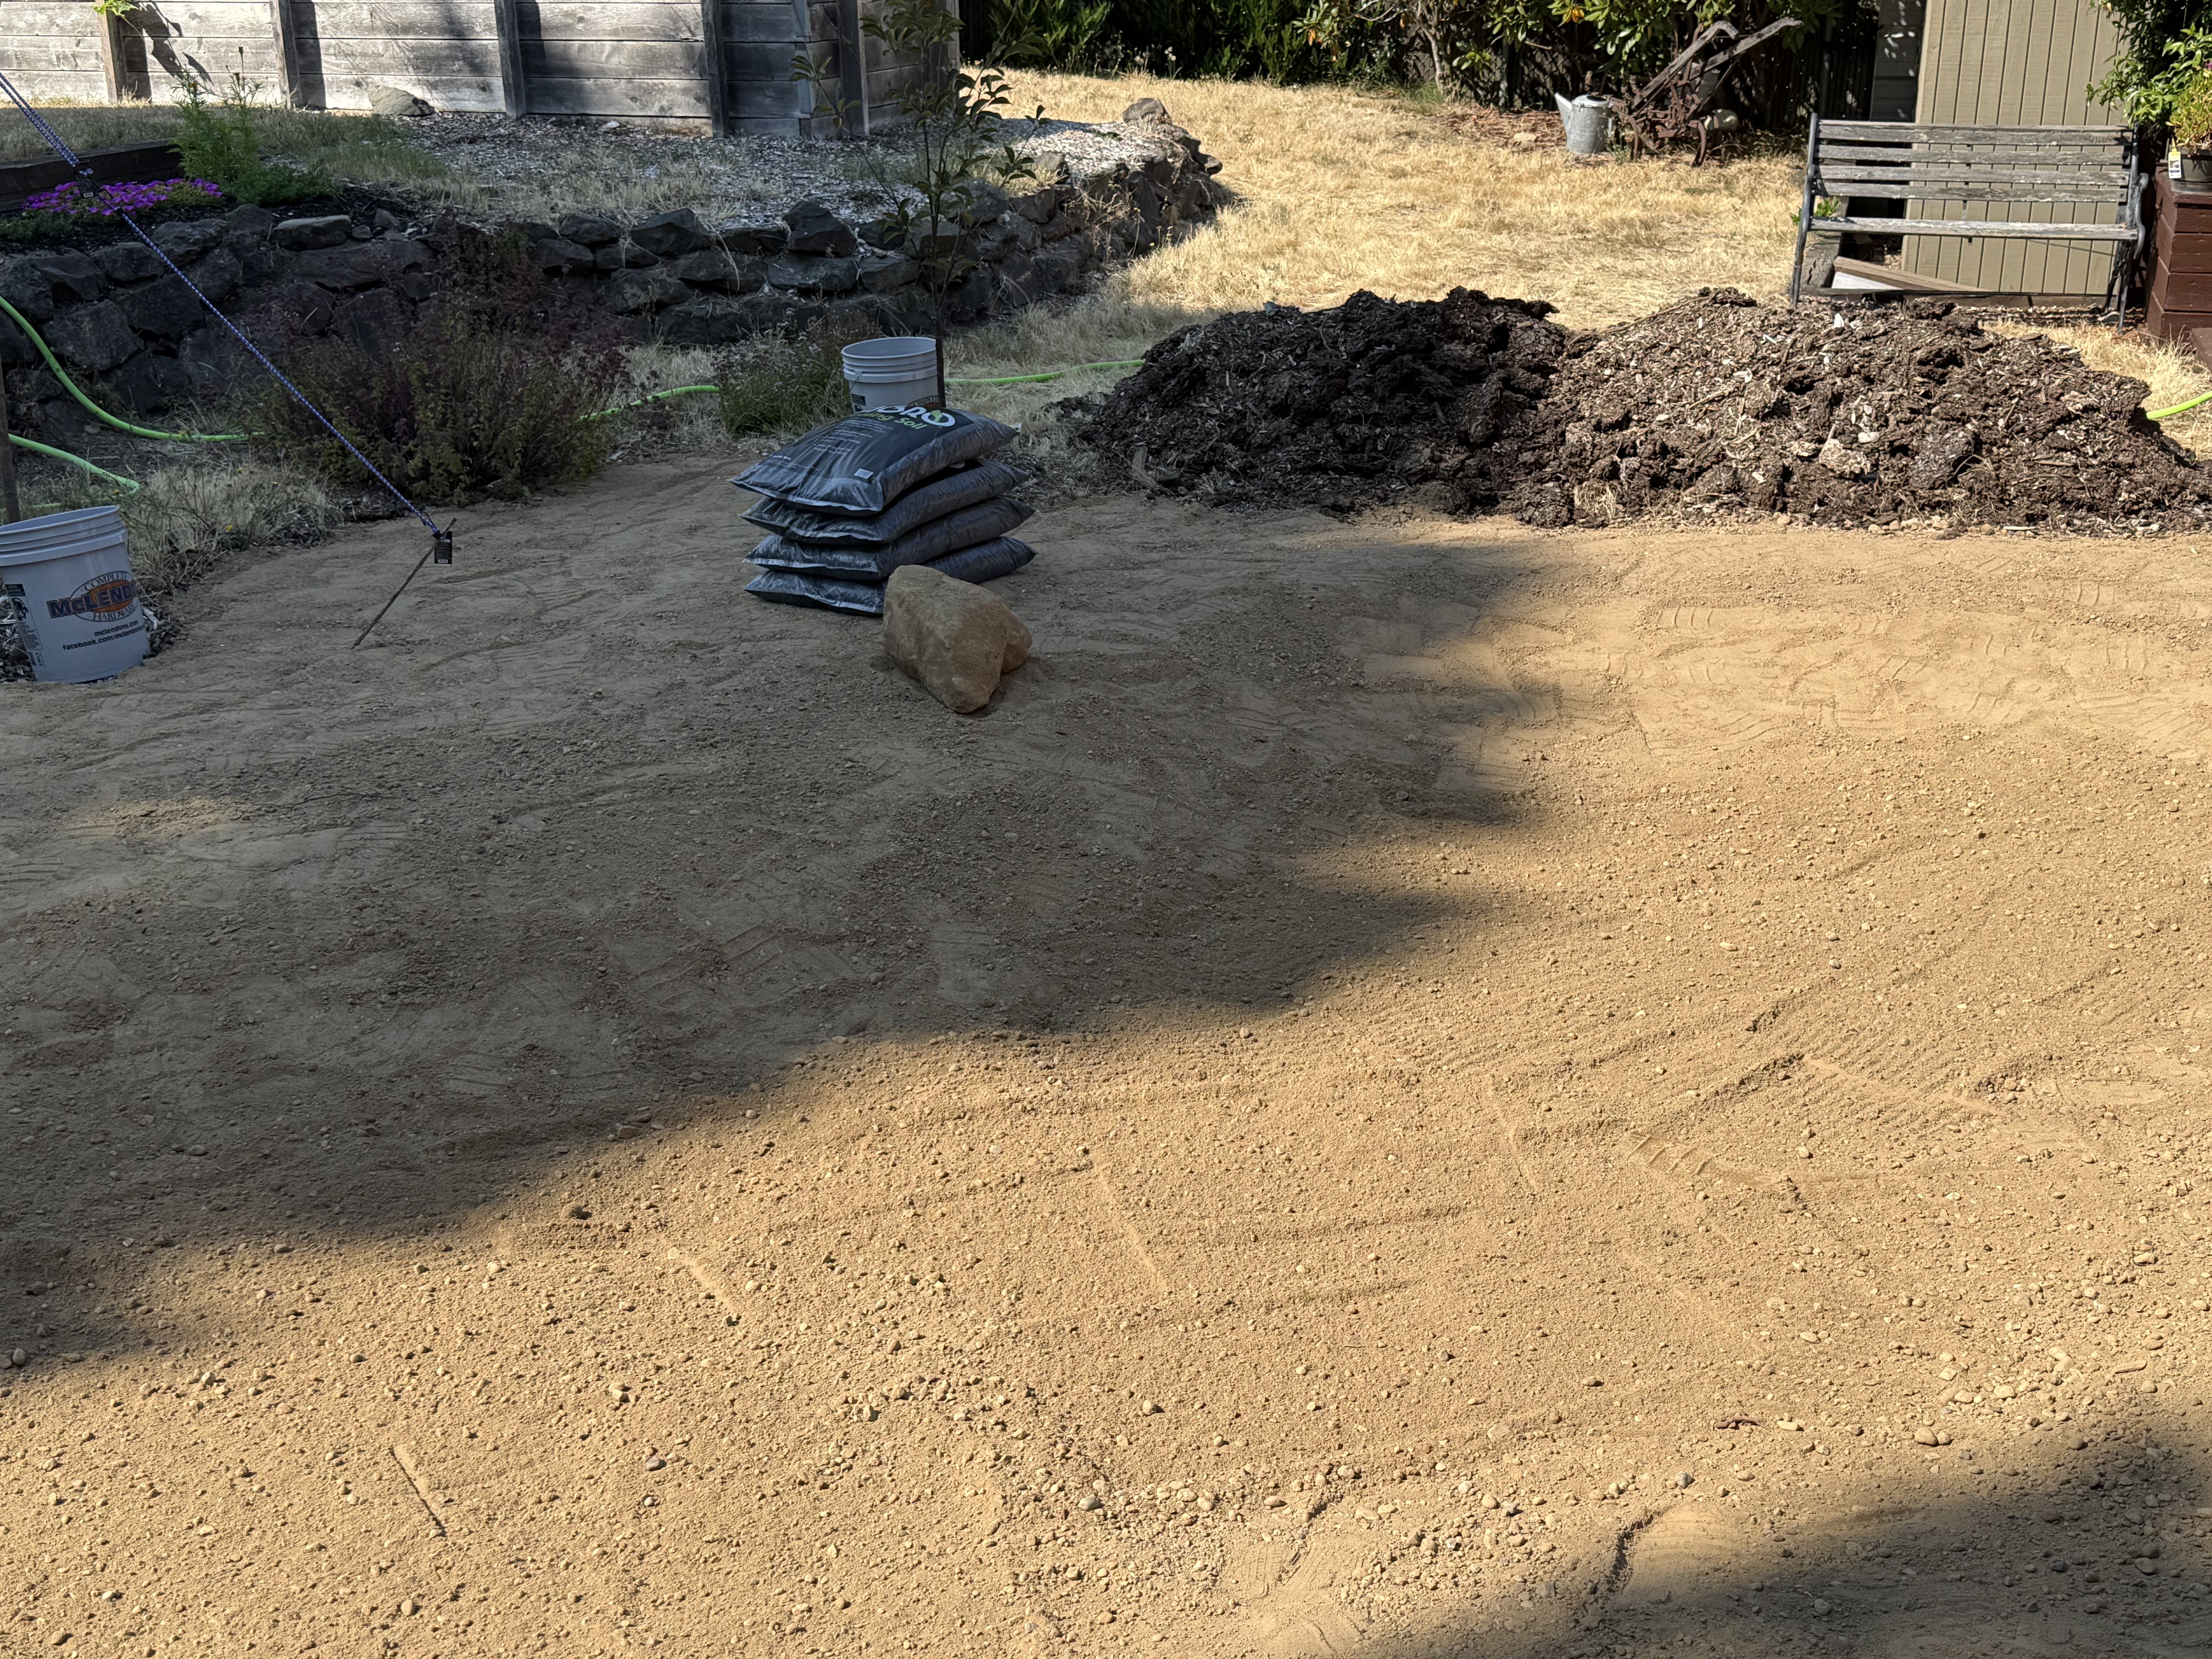
I finished the surface today, and dug down about 10 inches to mix in compost for the central planting area. Along the way I encountered this boulder, which weighed a couple hundred pounds. I was able to roll it up the slope, but now what do I do with it? I’ll be using a compost created from yard waste collected by the city of Tacoma to amend the silty soil. The hole ended up deeper than I like, so I’ll need a lot more than four bags…

These are all the stones I could easily remove from the soil I removed and that to be amended by compost. Hauling them in a steel bucket may seem inefficient (it is), but carrying fifty pounds at a time is a lot easier than rolling the wagon up the hill, which is about six-feet higher than the job site. I estimate that I lost 10-15% of the soil volume, which will be replaced by compost.
Excavation Update
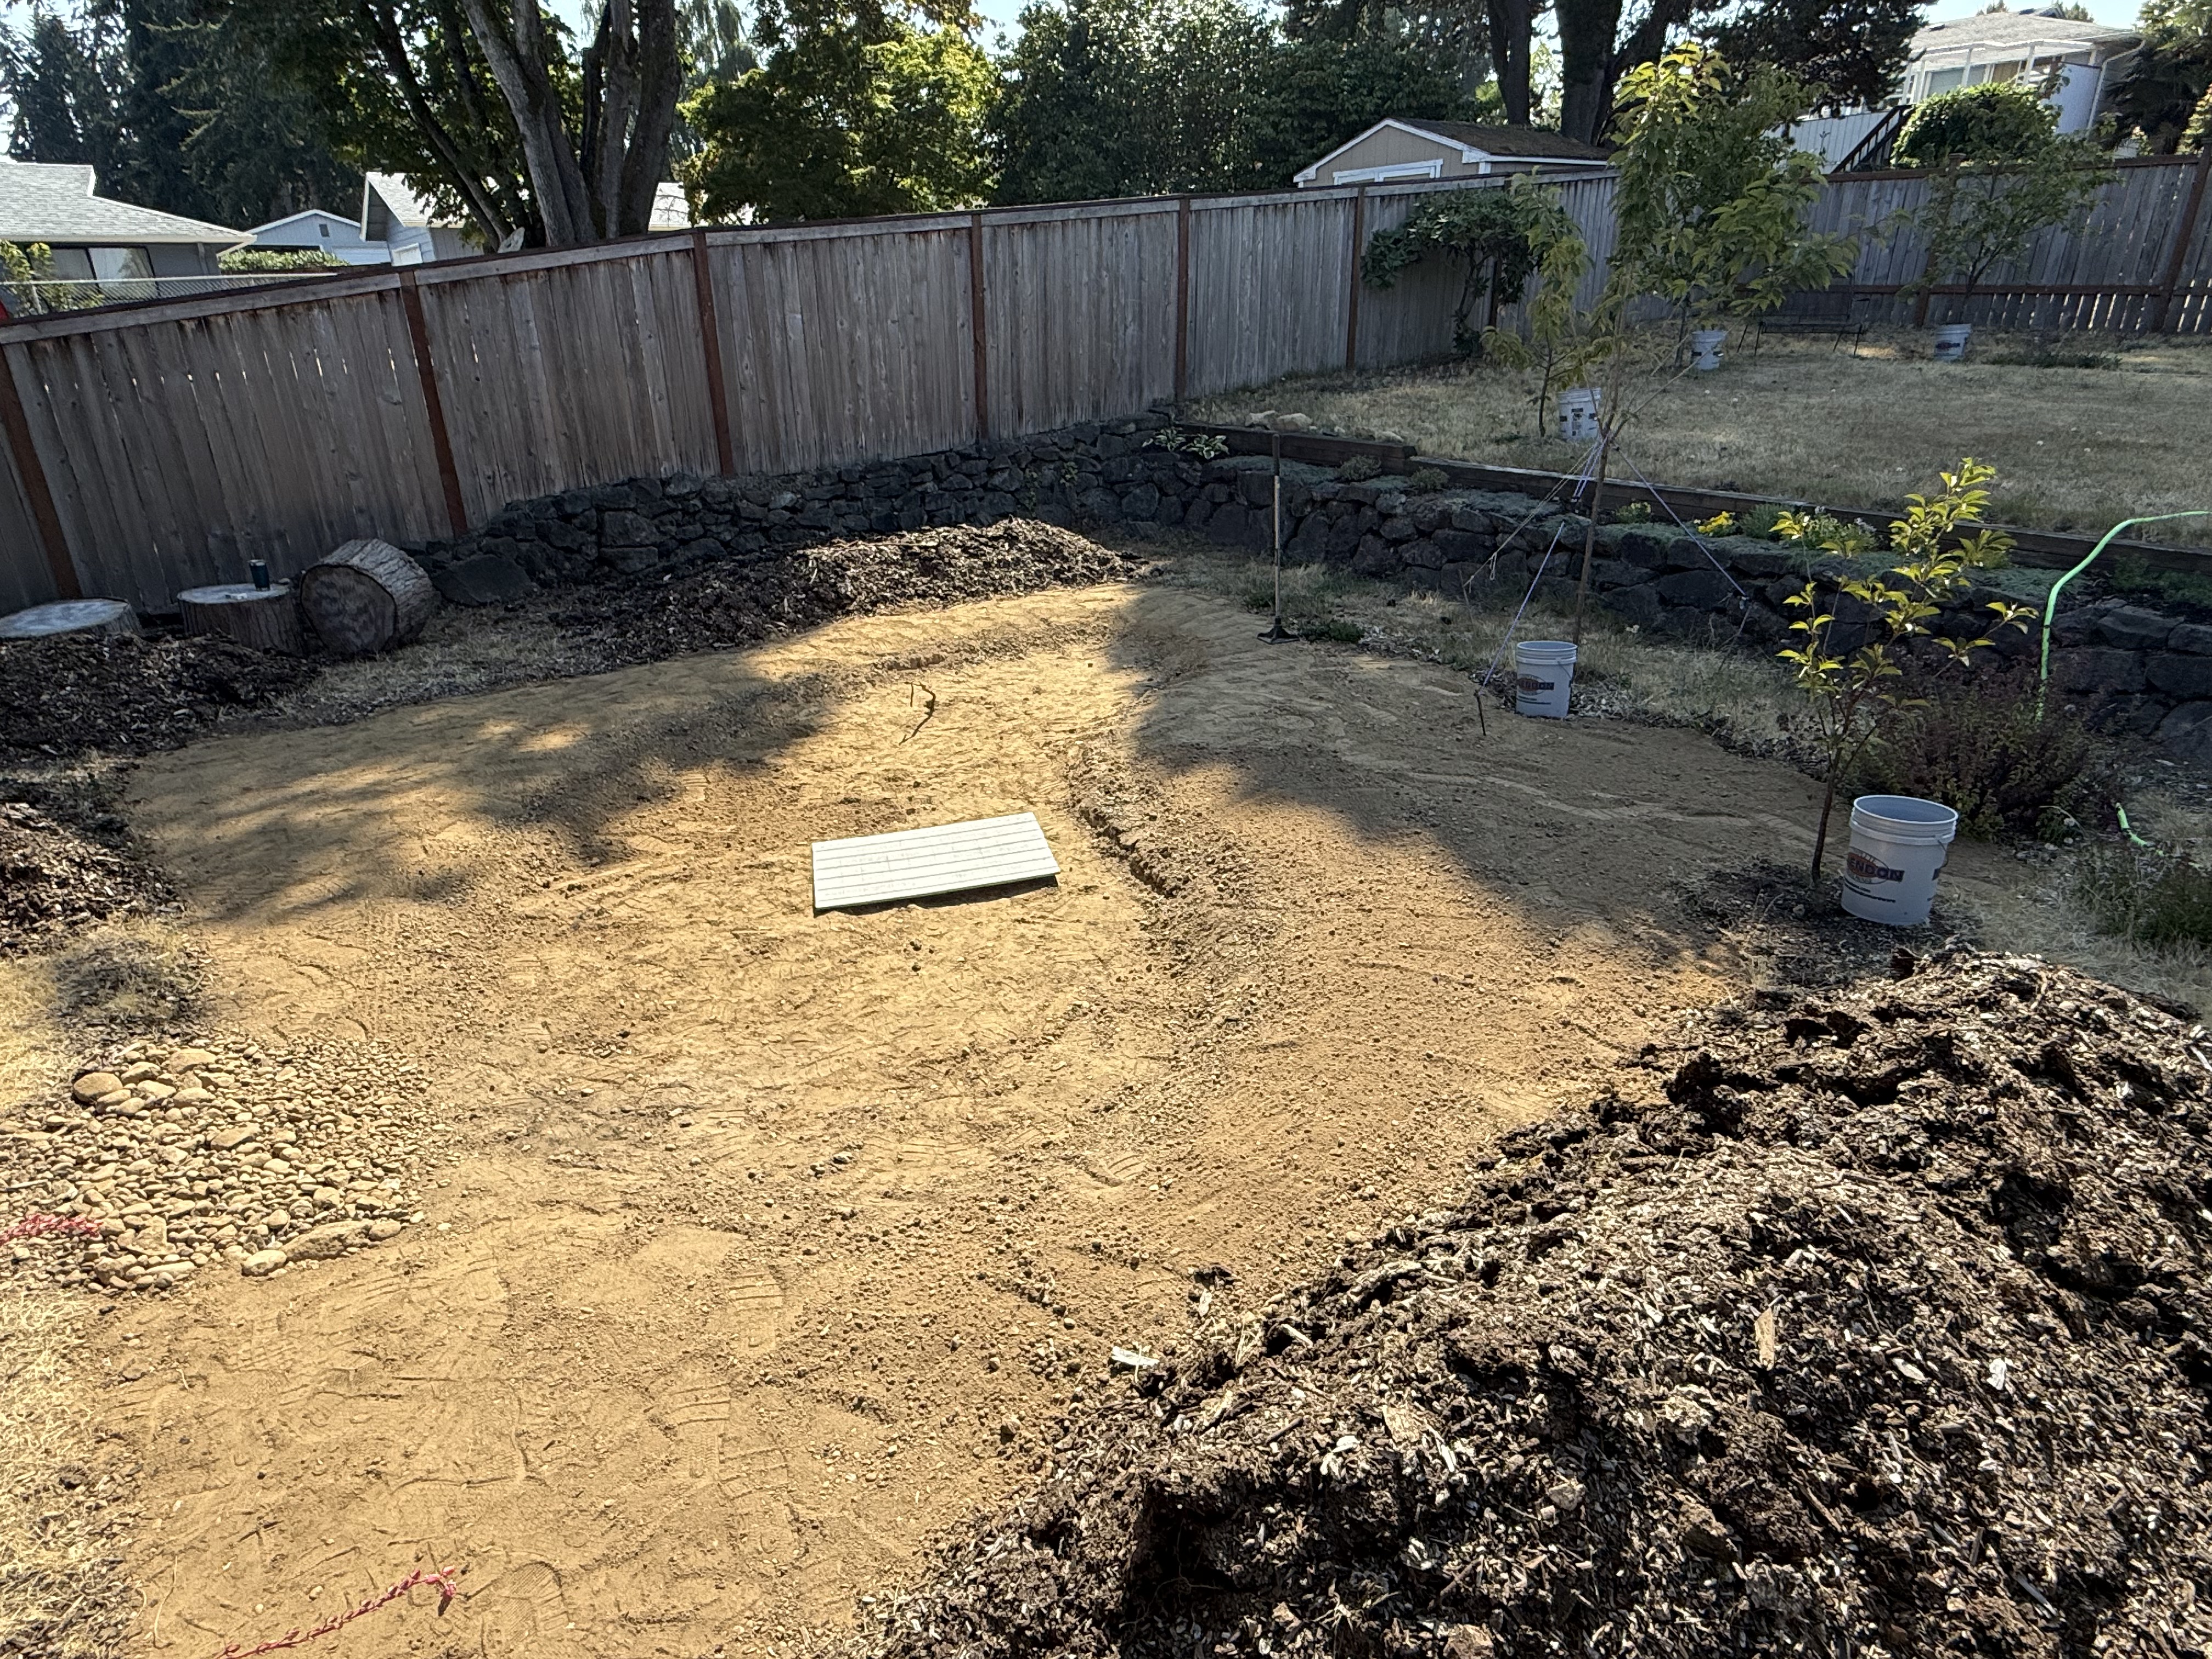
Five hours of digging finished the major excavation–six inches of soil removed, cleaned, and spread around the site. I’ll remove another 6-8 inches along the center next and knock the sides down to a 30 degree slope. I had to transport most of the pebbles and cobbles up the hill, but some of it filled the inflow sluice (to the right in the image).

I found this soil tamper in the shed, left by the last owner. It does a great job compacting the relocated soil and isn’t too much work to use. And it’s a lot more efficient than walking around in circles to use my body weight.
Excavation Begins
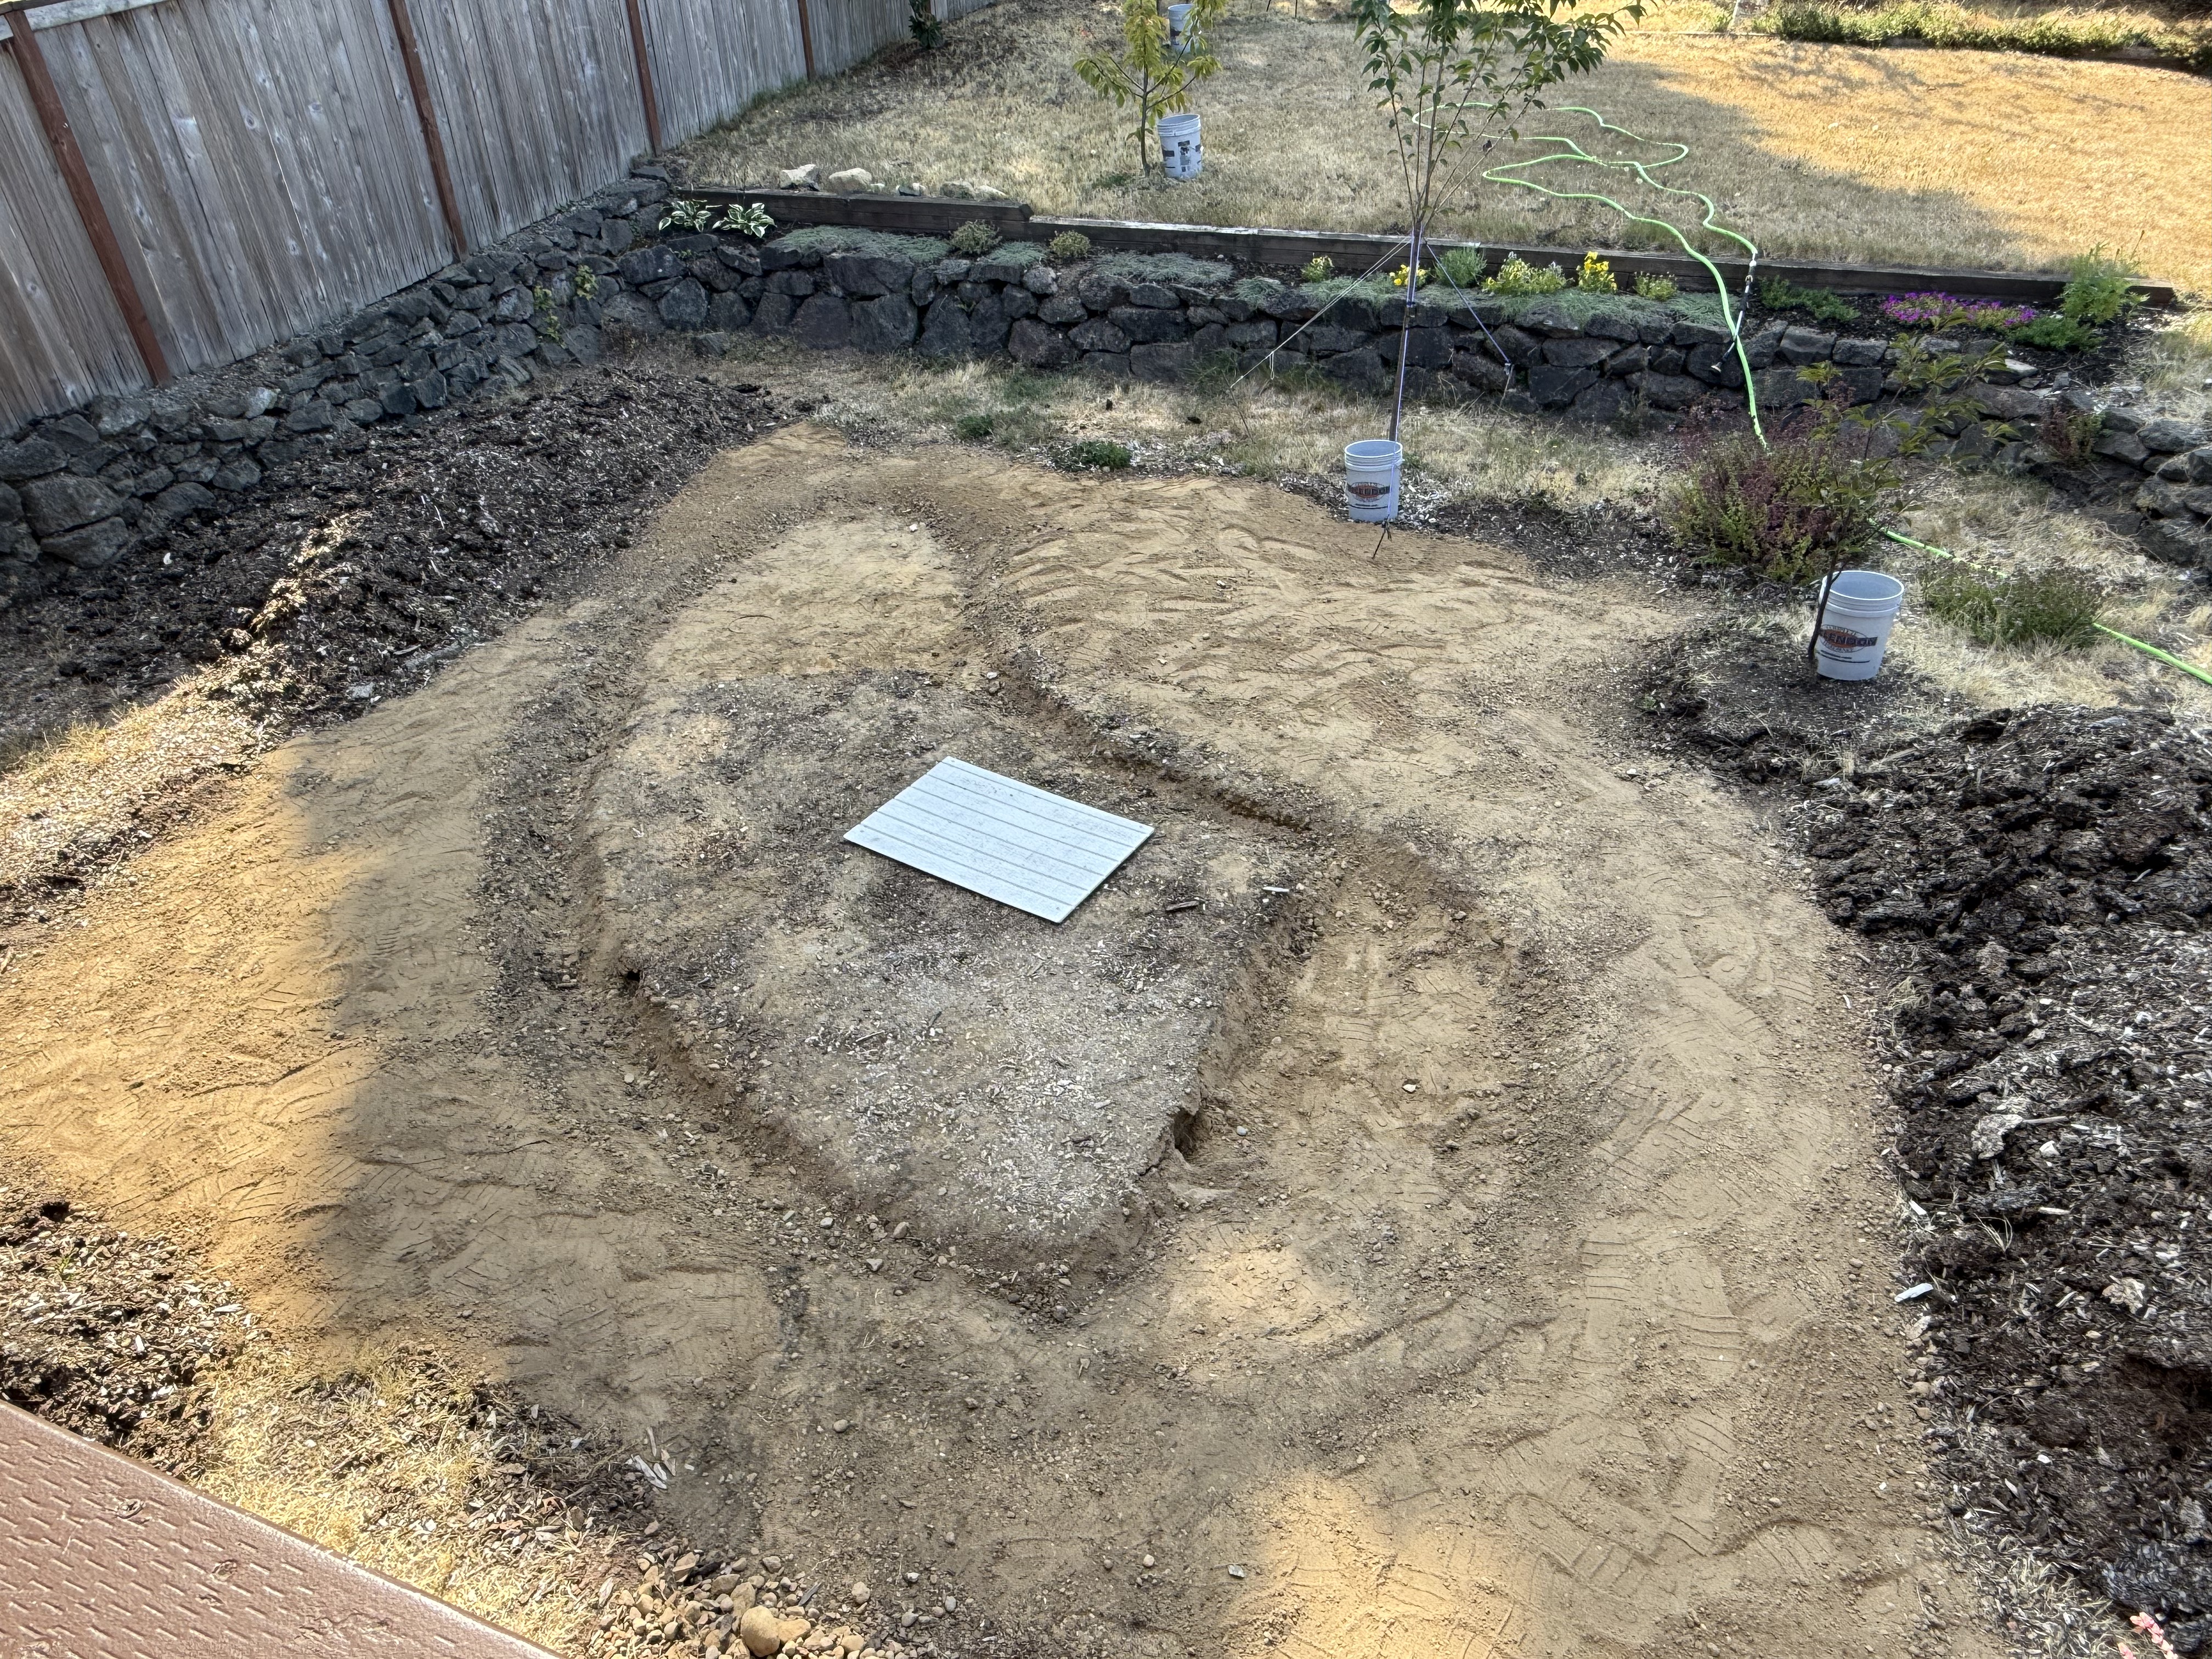
I worked four hours today and made a lot of progress. This photo makes it clear how shallow the rain garden pond is going to be; the areas that have been excavated to 6-8 inches aren’t going to be any deeper. There will be a deeper (18 inches before backfilling with compost-amended soil) thalweg along the center of the pond, and I’ll cut a slope of about 30 degrees from the edge to the center line. The piece of siding is covering the infiltration hole–a sure ankle breaker for someone like me stumbling around with shovel-fulls of soil. Better safe than sorry.
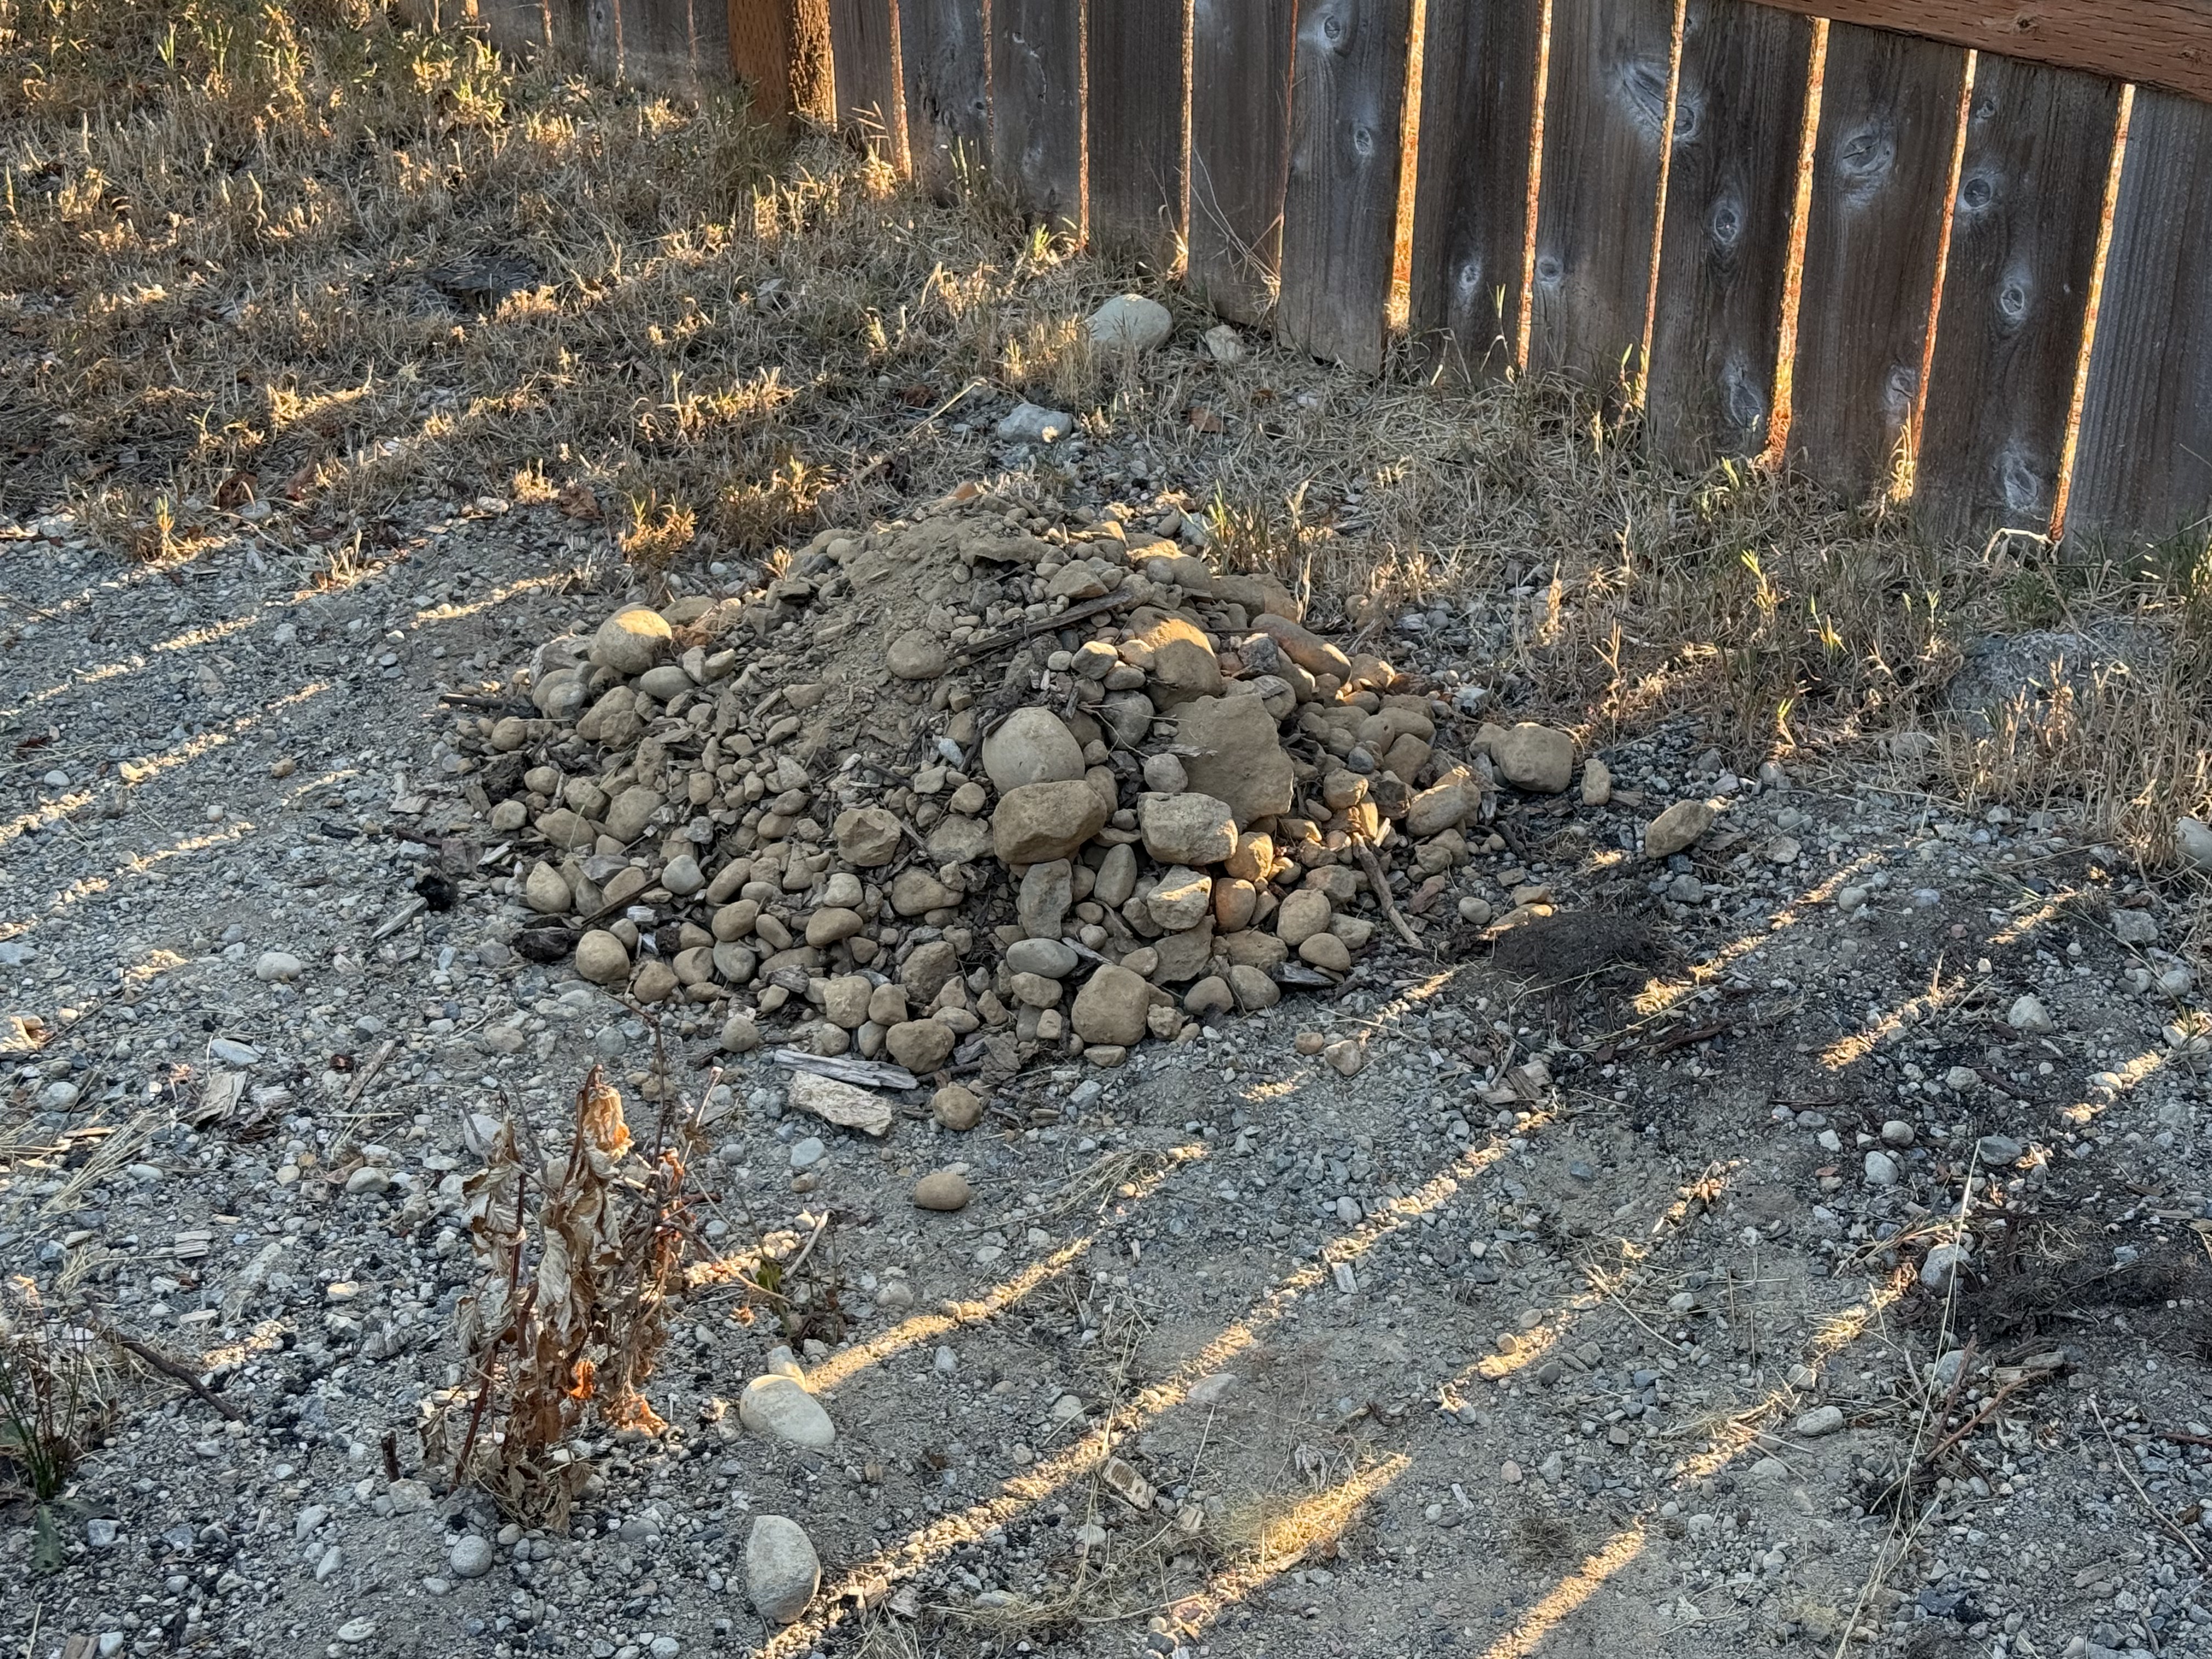
I definitely have more pebbles/boulders than I need. I’m dumping the excess in a quiet corner of the yard. I’ll figure out what to do with it later. I’ve been using this area to dump soil removed to plant a few shrubs and small trees, so the new material fits right in.
This is my version of being a sculptor, but I work with earth rather than clay.
Breaking Ground on the Rain Garden and Pond
This is going to be a long-term project, but that doesn’t mean I can wait for someone else to do the work. Actually, I enjoy working with soil and rocks, maybe because I’m a geologist. After 20 years living along the Gulf Coast, where rain falls by the bucketful, and the land is often flat and impermeable (when it isn’t waterlogged), I’m familiar with drainage projects like this. I prefer surface drainage over buried pipes because they are easy to monitor and keep clear of debris.
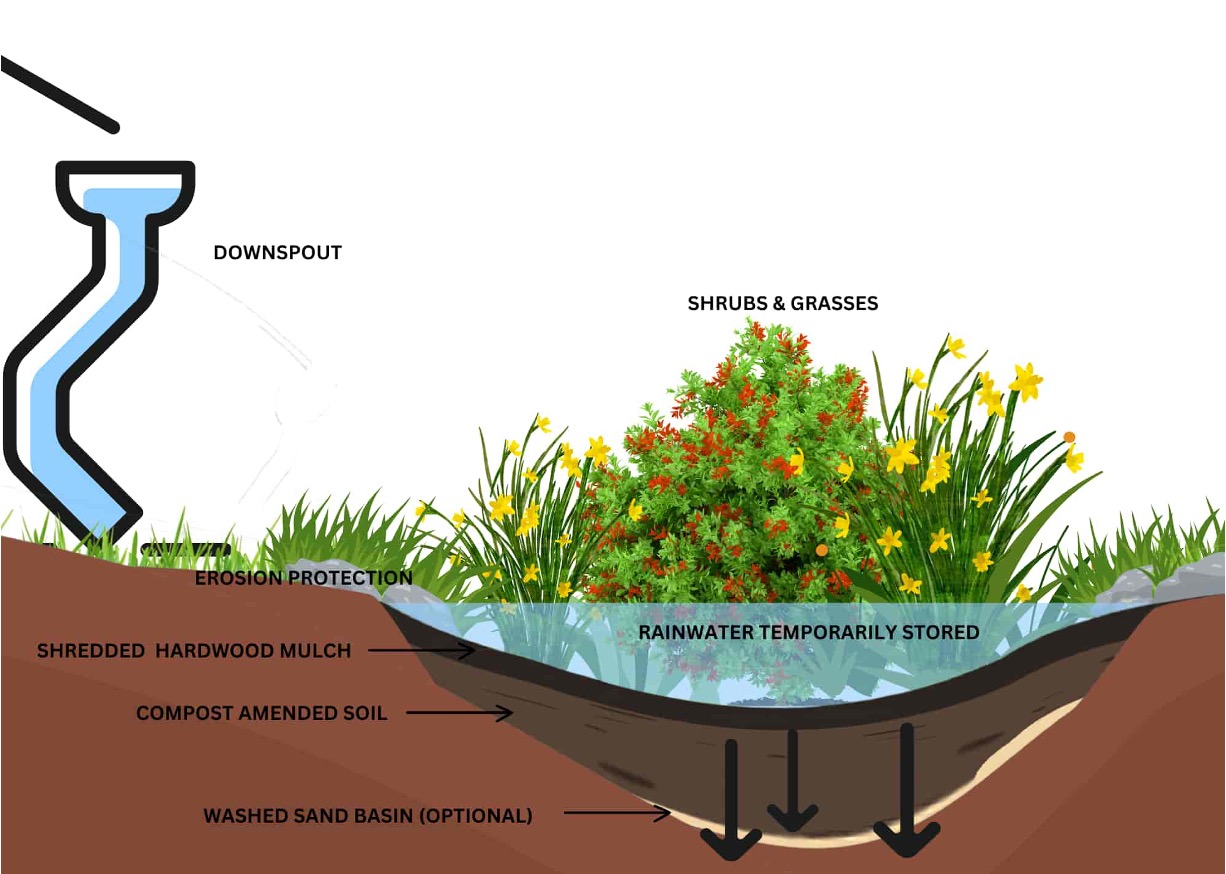
This schematic drawing of a rain garden pond summarizes our plan pretty well. The pond isn’t intended to have standing water, so it isn’t lined; instead the bottom is typically filled with a mixture of sand (easy for us) and compost or some equivalent material. We already have a lot of mulch for covering the area.

The hole is going to be about 18 inches deep in the center, and filled with a mixture of the removed soil and compost/mulch. I don’t need to increase infiltration or water retention; the soil contains a lot of silt and thus holds moisture surprisingly well, while being well drained. Inflow will be through a sluice cut into the soil from the deck (the shovel location) to the edge of the pond. I plan to use the stones collected from the soil to armor the inflow; from the looks of the refuse so far, I should have plenty.
Other than dealing with all the rocks I’m finding in the soil, it isn’t too difficult to remove.
The outline has been set with a couple of hours work, but now the hard work begins. I am going to remove the inner soil to match the perimeter depth, then cut a smaller area down six inches deeper. This process will be repeated until I reach the design depth. The refuse is being used to fill the 4-inch area where the mulch was removed; it will also be used to build a low berm.
The next few months are going to be slow going, but I’ll keep you posted.
Stormwater Retention Project
I always heard that the Pacific Northwest gets a lot of rain. Having lived in southern Louisiana for 25 years, I was a little skeptical. So when I moved here last year, to discover that all of the yards were brown, but the flowers and trees were flourishing, I became interested in the annual rain pattern. It doesn’t rain here in the summer. No thunderstorms twice a week. Nothing.
Water isn’t particularly expensive here, but I don’t like using clean tap water on plants. It turns out that most of Tacoma’s water comes from glaciers on Mount Rainier (Tahoma to natives). They melt naturally in the summer, so we aren’t using groundwater and have no control over their rate of melting.

We inherited a number of young fruit trees, which need a lot of water. Seeing how nice many of our neighbor’s yards were, we decided to collect plants. I watched water flowing out of the downspout during spring rains, flowing down the driveway into the street, and directly into Puget Sound. We installed a couple of rain barrels to collect some of it; you would be surprised how fast they fill during the light rains (compared to the Gulf coast) I’ve experienced here in Tacoma.
It turns out that Pierce County has a stormwater retention program, to prevent pollution of Puget Sound, and one can get free consultation on home projects that reduce storm runoff. There is even a competitive proposal system to get limited financial assistance. We jumped at the opportunity to contribute to the continued health of the place we’ve already fallen in love with.

The back yard was a basketball court at some point, complete with 3-4 inches of concrete. The previous owners removed the concrete (thank god!), but left some irregularly cut tree trunks. We were thinking about planting a garden in this area, but now we were part of something bigger than our back yard. We could get assistance on the whole project, from collecting rainwater to distributing it, and keeping it out of the pristine waters of Puget Sound.
But there were some engineering hurdles to clear…
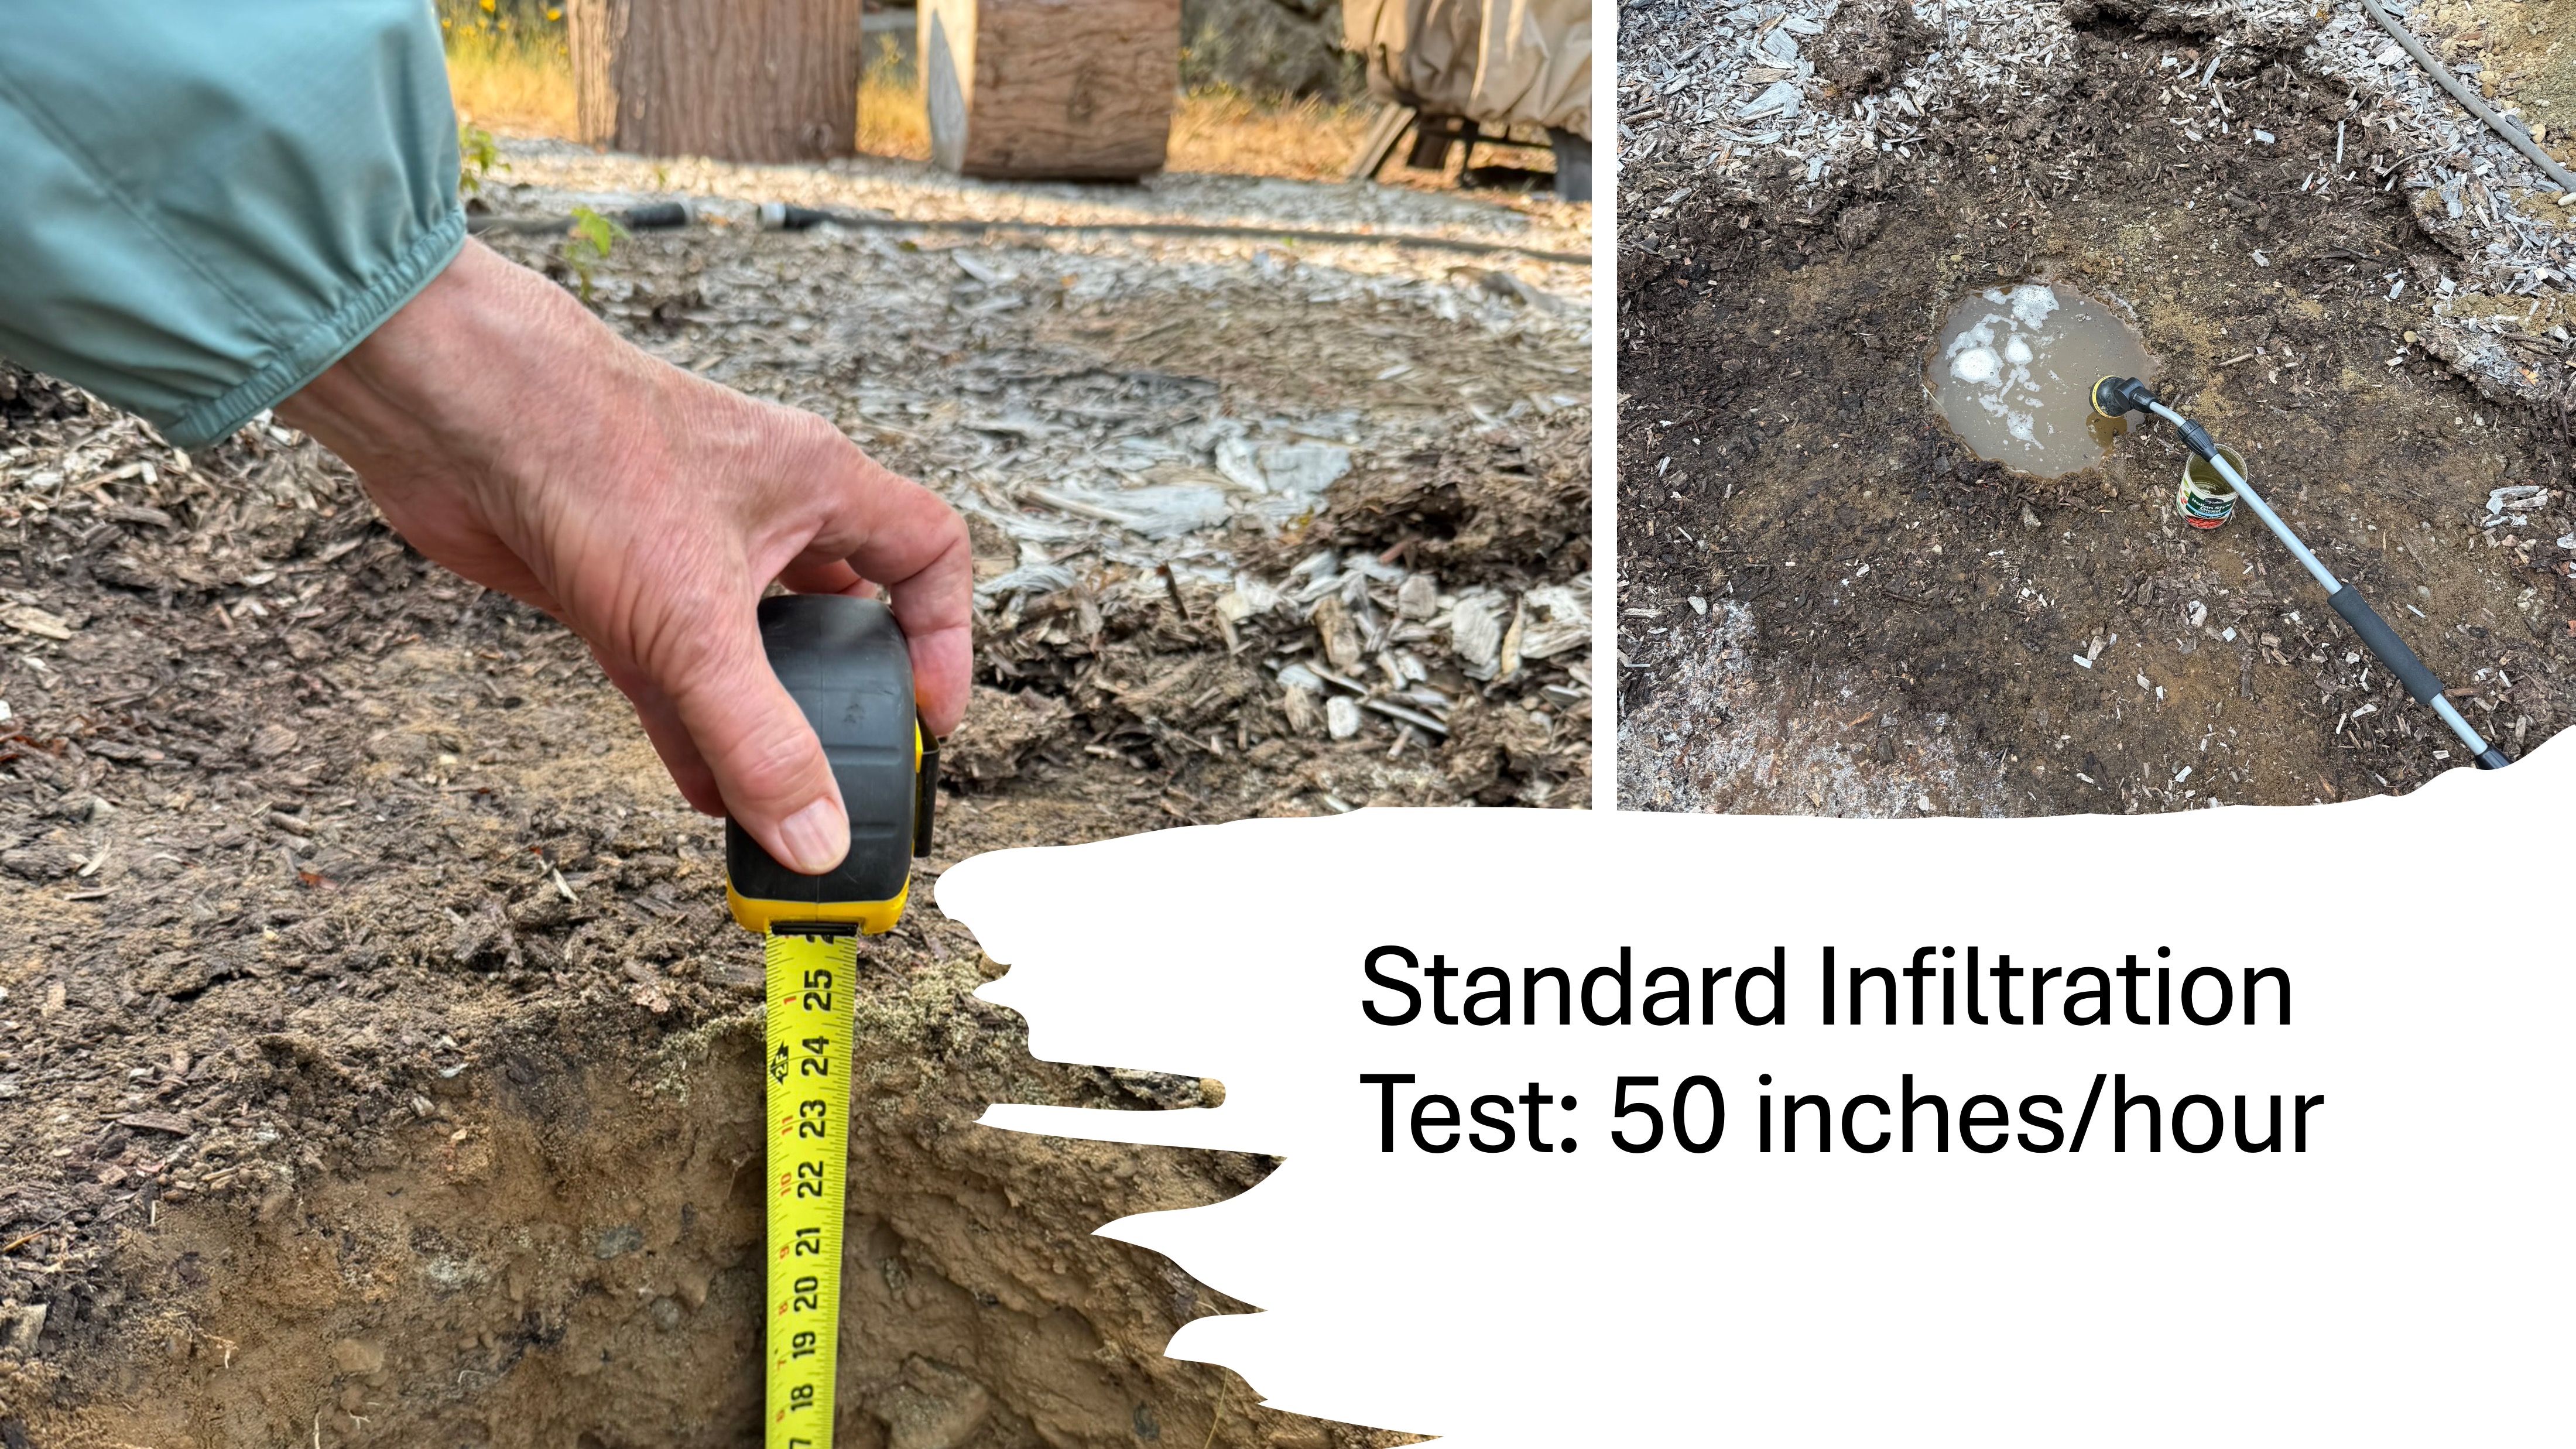
We had to demonstrate that the soil under our back yard would absorb a reasonable amount of rainwater, which necessitated digging a hole and filling it with water. That sounds easy enough. The catch is that the soil in the hole has to be saturated before the test can be conducted. To assure saturation for all soil types, this means keeping a two-foot deep hole full of water for three hours. I had to keep the garden hose running at half-volume, tweaking it constantly, to meet this standard.
I spent the morning babysitting a one-foot-diameter hole with a hose running constantly.
But I kept the hole full for three hours. Finally, I could conduct the test. I filled the saturated soil to 12 inches and waited, but not for long! As I already knew, it drained in 17 minutes, as measured by a stopwatch. We have well-drained soil (mostly sand with some clay and rock cobbles).
While my garden hose kept the ground saturated, I kept myself busy, removing 4 inches of mulch filling the 4-inch deep depression left by the basketball court. I’m going to keep the material on-site as much as possible, to avoid hauling it up the slope seen to the right in this photo, where it would (please, god, no!) be spread to form a slight hump in my back yard.
You would be surprised how fast soil is used to fill a 4-inch deep area the size of the remaining mulch seen in this photo.
I can’t wait to begin digging the pond. I’ll see you then.


Recent Comments