Drive to Adelaide, SA: Paleozoic Sedimentary Rocks
Today’s post covers the drive from Site 1 to Site 2 (Fig. 1), going from Quaternary volcanics to folded and faulted Paleozoic sedimentary rocks. The latter are presumably similar to the rocks that hosted the original magmatic gold that was eroded to form alluvial ore bodies like at Sovereign Hill.

Site 2 (from Fig. 1) can be expanded to show details of our movements within Grampians National Park (Fig. 2). Figure 2A shows the topography of the entire mountain range and the inset (Fig. 2B) is the first location we visited (Site 3).

The quaint tourist town of Halls Gap was entered through a narrow opening in the frontal ridge, seen to the extreme right side of Fig. 2B. Looking up from town, the ridges can be seen to form cliffs and dip generally westward (Fig. 3).

Figure 2 suggests steep cliffs on the east side of the ridges, as indicated by darker shading, and lower slopes on the west. The yellow-filled area in Fig. 2B is a uniform block that is tilted westward, which will be shown in detail below. Our path took us west of this fault block. The road is indicated by a white line pointed westward. A circuitous path took us eventually to Site 3 and afforded an opportunity to examine the rock up close (Fig. 4).
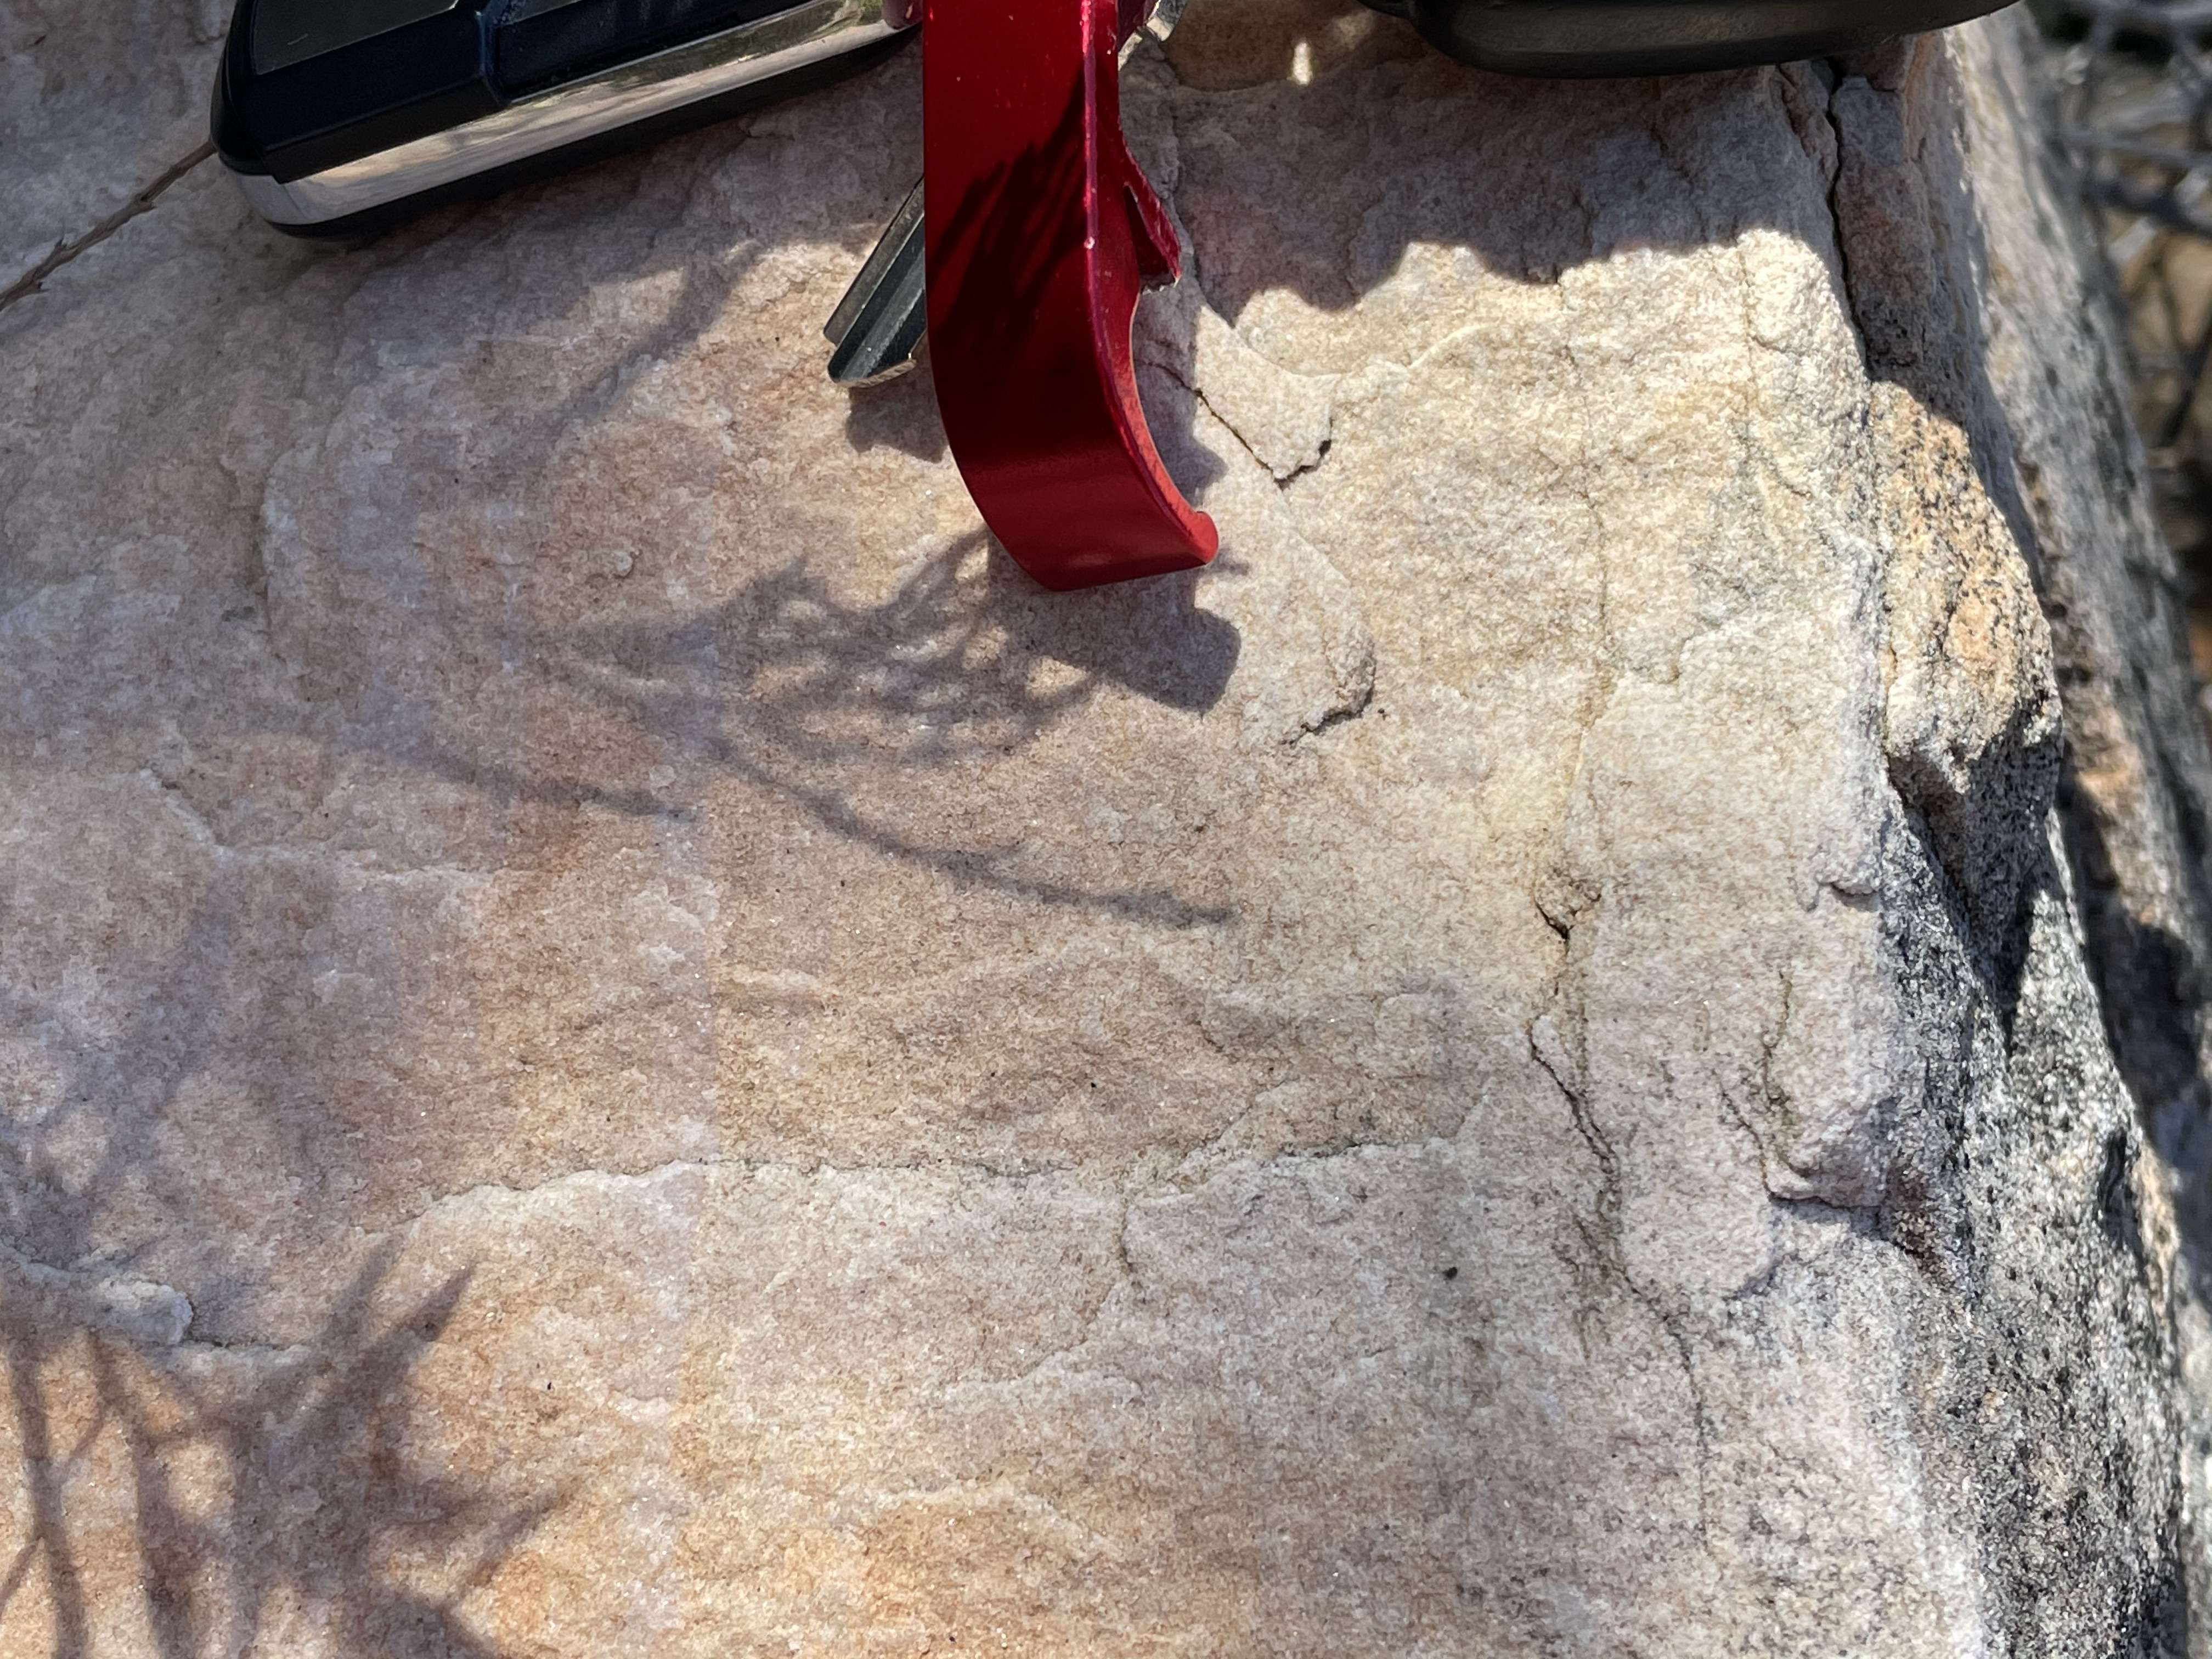
This is a well-sorted sandstone. According to RockD, it is the Grampians Group, marginal marine and fluvial sandstone with some red mud and conglomerate (444-427 Ma). This sample doesn’t show any crossbedding or other fluvial structures but it is fairly uniform in texture. Furthermore, zooming in on Fig. 4 reveals that the grains aren’t as rounded as we would expect from a beach or marine sand, which has been worked by wave action. The reddish hue is another indicator of a fluvial origin because marine waters have less oxygen and don’t oxidize iron within the cement. Oxidized iron (rust) comes in many hues of red.
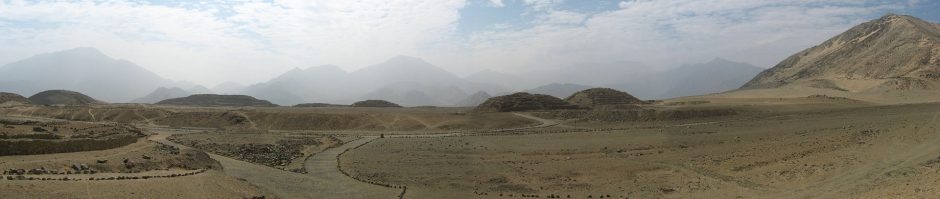
The view from Site 3 (Fig. 5) reveals Lake Bellfield in background and the fault block shaded in yellow in Fig. 2B in the foreground. Note the uniform surface dipping to the west. This is a bedding plane and it was originally horizontal. Note also how the cliffs in the center-right of the photo are nearly horizontal. This suggests folding, which is associated with compressional tectonics. Keep in mind that these rocks were buried several miles beneath the surface when deformation occurred ~400 million years ago.

As it turns out, the rock layers are not uniformly dipping to the west as suggested by the topographic map (Fig. 2). For example, at Site 4 (see Fig 2B for location), the following view (Fig. 6) shows the variability of the mountains as seen from the ground.

Looking first to the southern end of the range (e.g. Zumsteins in Fig. 2A) shows the kind of appearance that the westward dipping fault block in Fig. 5 would imply (Fig. 7A).
Figure 7. Close-up shots from Fig. 6.

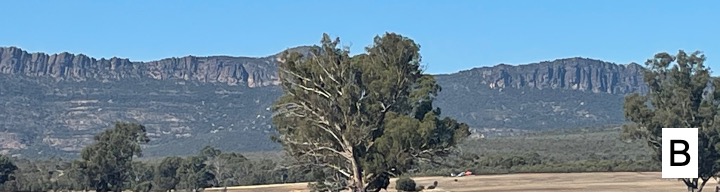

Figure 7B, slightly to the north, reveals high cliffs somewhat further away, possibly east of Wartook (see Fig. 2A). The cliff is unbroken except for a saddle just to the right of the central tree. Further north (Fig. 7C), the ridge is in the foreground and a higher ridge, facing east, forms the skyline. This location is about where Laharum is located in Fig. 2A. Thus it would seem that faulting was not uniform. No where is this more evident than just north (to the left) of Fig. 6.

The southern (right side) rocks tilt to the north whereas the northern (left side) tilt to the south. Glancing at Fig. 2A, we see that the V formed by these fault blocks is at the narrowest (and lowest) part of the ridge they form.
Taken together, these observations suggest that deformation was not a simple process here, just as observed in previous posts. The geologic map (Fig. 9) reveals several faults in Grampians National Park.
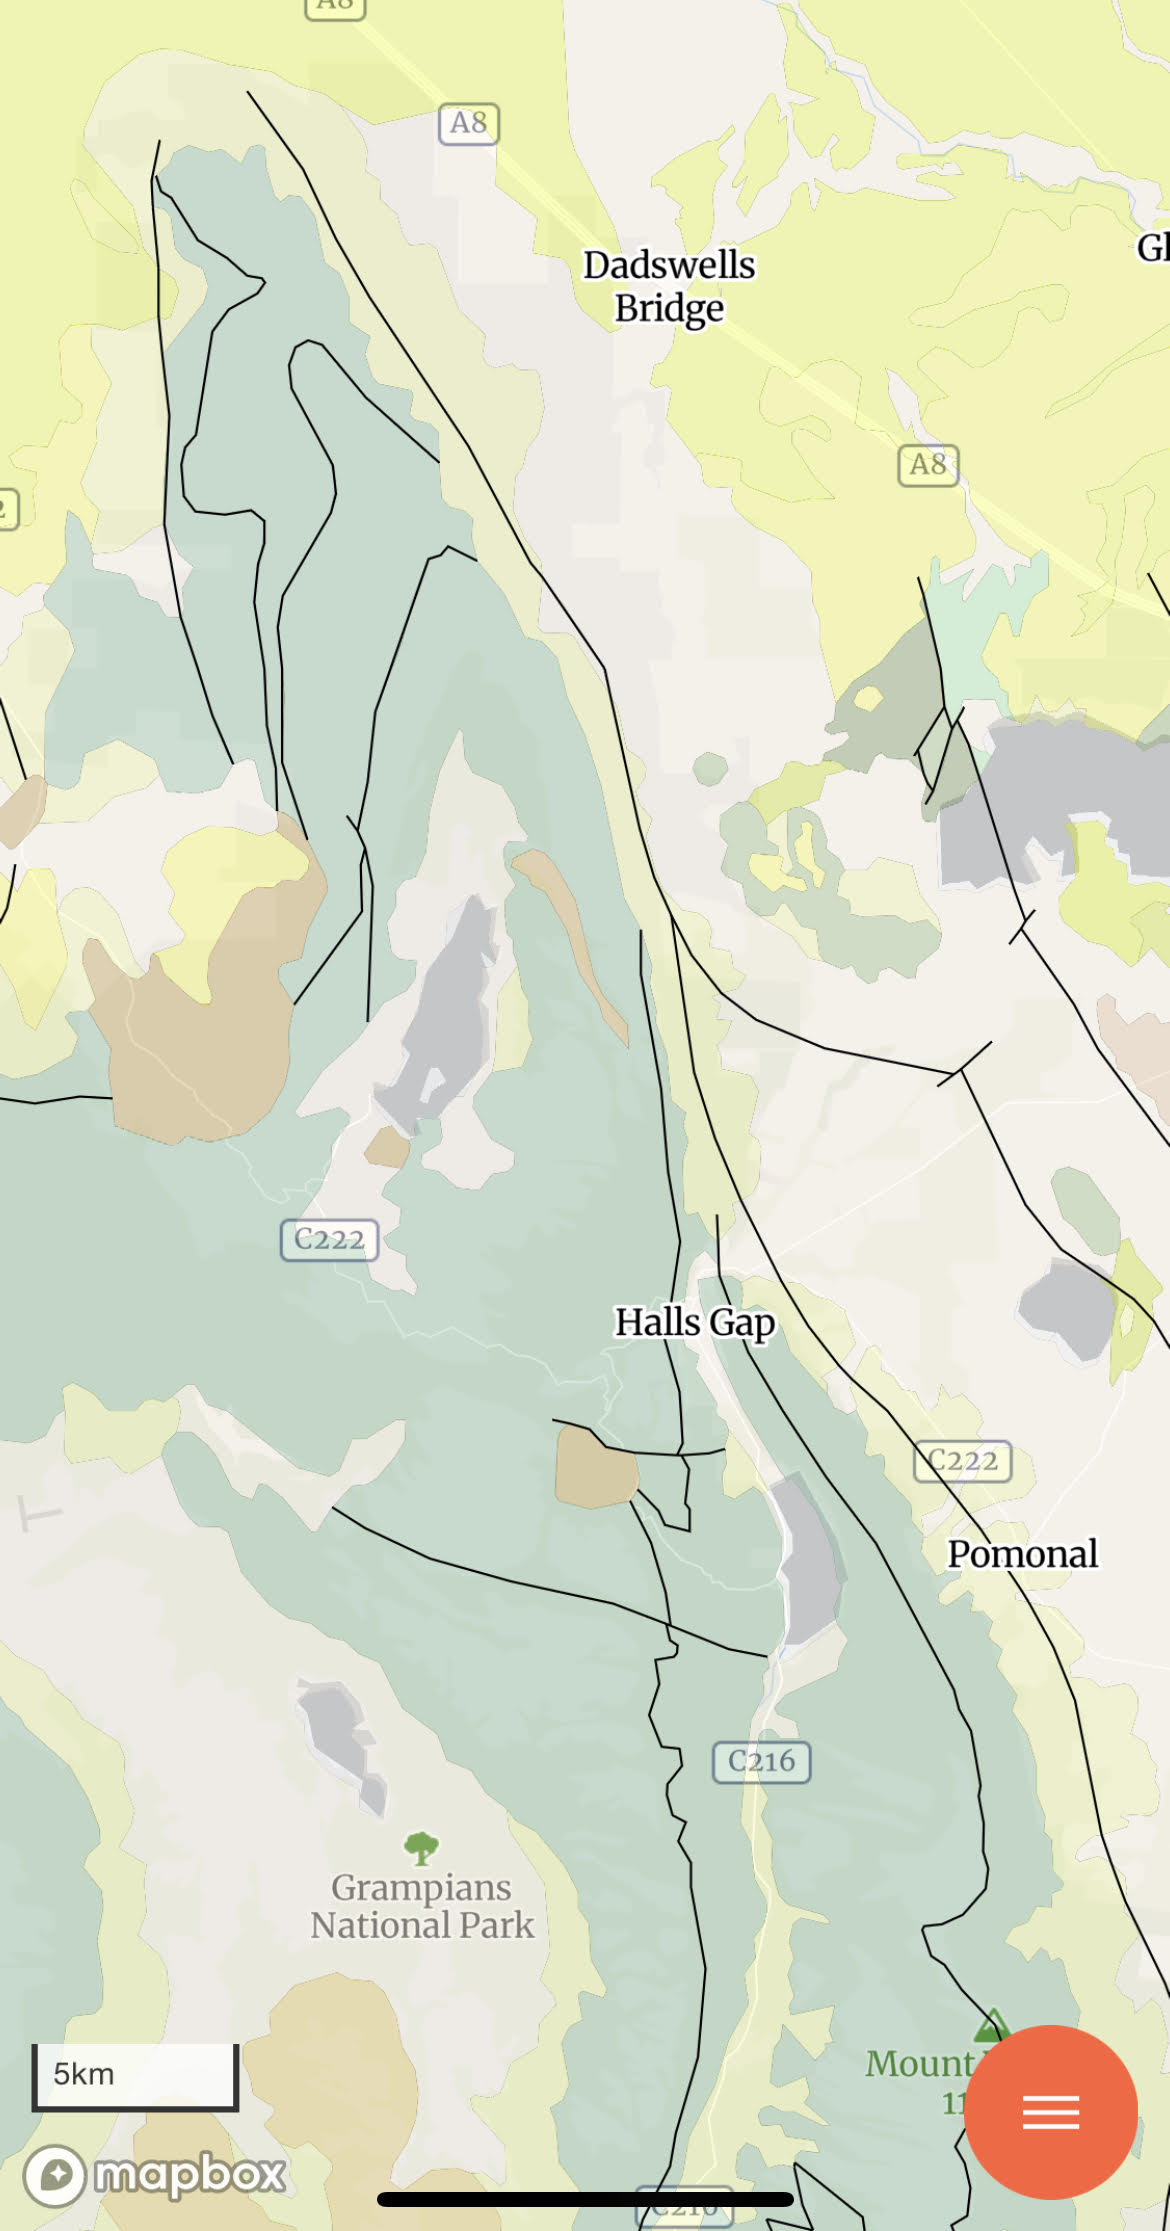
The map reveals several N-S trending faults along which the huge blocks seen in Fig. 2B and Fig. 5 tilted to the west. It also shows nearly orthogonal faults (e.g., south of Halls Gap), and curved ones near Dadswells Bridge. This suggests that folding may have occurred after faulting. One possibility is tectonic inversion, in which (for example) a stress field changes from extensional (e.g., before 450 Ma) to compressional (e.g., after 400 Ma). Such an inversion of tectonic stress would reactivate old faults and deform them, as well as allowing thrust faults (compression) to occur on previous normal faults (extension).
Just an idea…

Recent Comments